Studio Shelf
My music studio layout seems to always be changing. Just like in doing most things, we either discover new and better ways of doing things, or our ideas, environment, or tastes change. My current music room has been pretty good so far. The main components of the room are a large 4k monitor, standing desk, keyboard/trackpad, MIDI knob controller, 88-key controller keyboard, audio interface, and an Ableton Push 2. These seem to be a good combination in terms of the human-computer interface. What I've noticed I've been doing most of all is searching for a desk/device layout that works best for me.
Keeping everything within arms reach is a worthy goal, but it seemed impossible to have the keyboard/trackpad and Push 2 both front-and-center. I tried putting the Push on a laptop stand, but it was too tall. Additionally, the knob controller (BCR-2000) and audio interface tended to get pushed to the sides, which made for a stretch or a mess on the desk.
Taking a little inspiration from the too-tall little laptop stand, and making use of some scrap wood from an IKEA bed that we were getting rid of, I decided to try to make a desktop shelf to hold the gear.
The shelf should not be too tall, it should be wide enough to hold the Push, BCR-2000, and audio interface, and I thought to make it angle around me would be good ergonomically, so I wouldn't have to stretch to reach anything when standing or sitting at the desk.
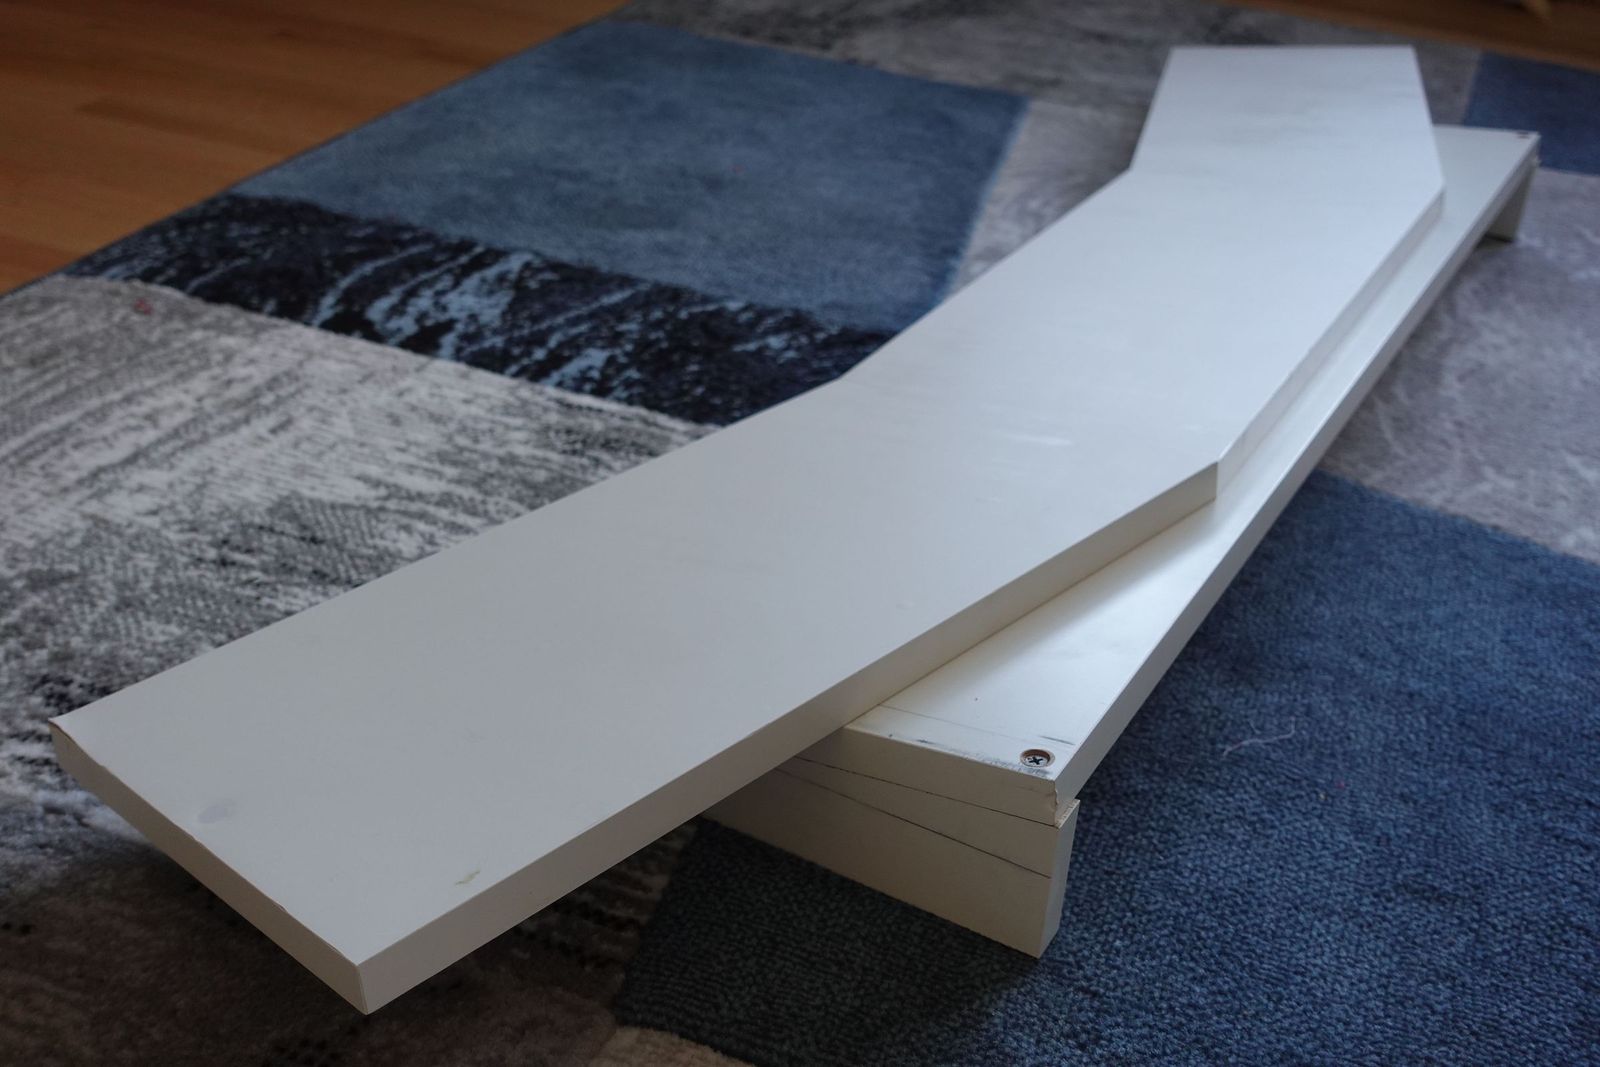
Here's the finished shelf, on top of the desk: 
It sits at a slight angle, so the devices that are elevated a bit are still within easy reach.
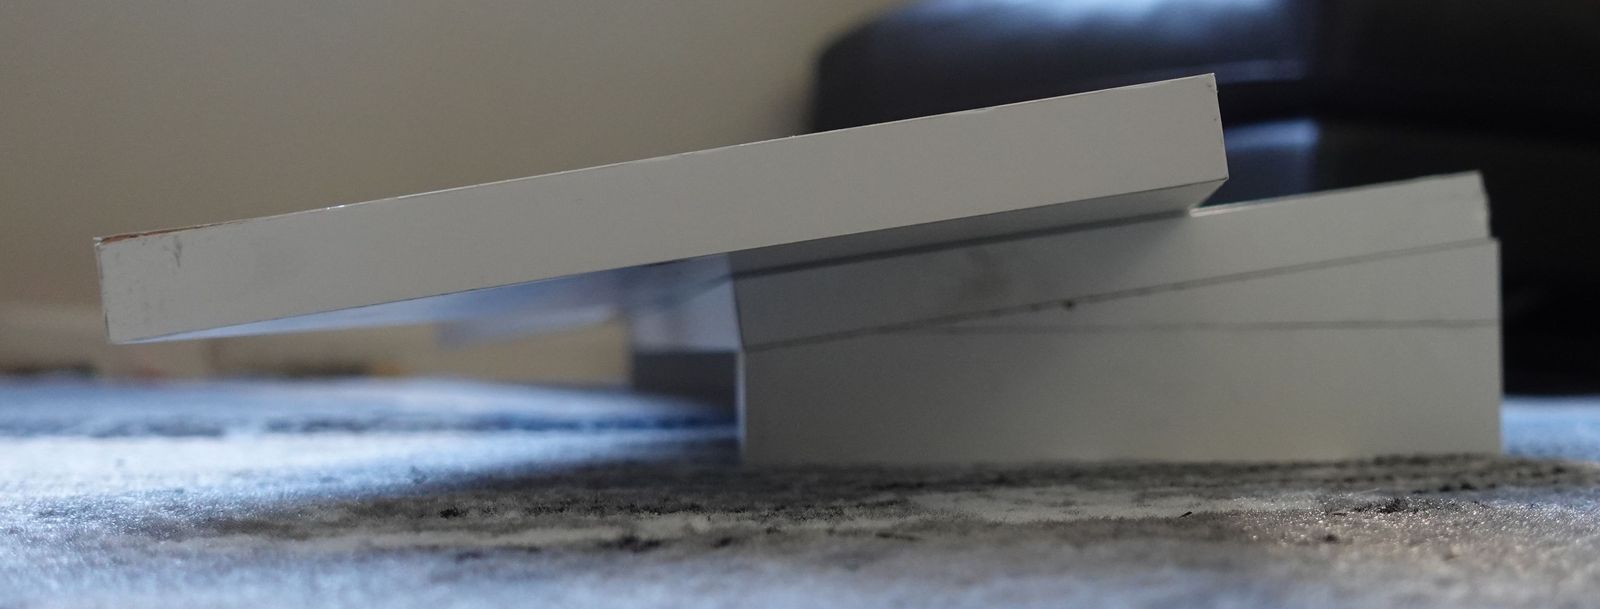
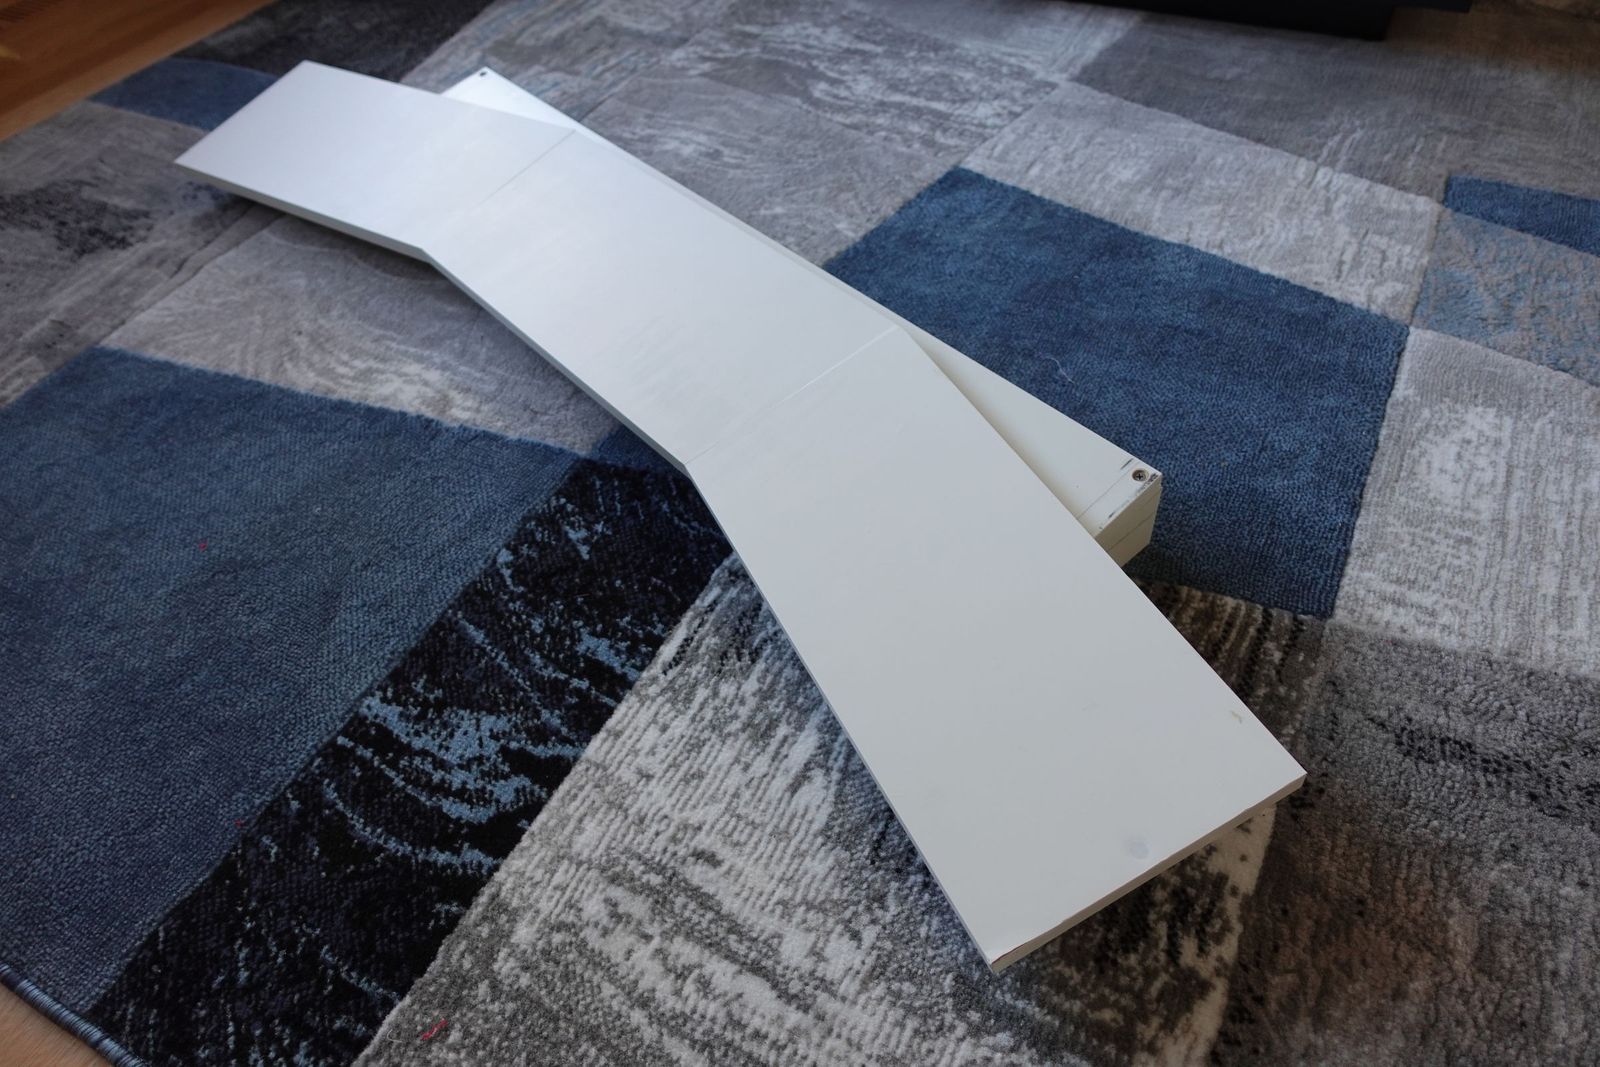
Here it is without anything on it:
This ended up being a very straightforward project to make, just taking an hour or so one morning. Here's what you need to do it:
- Three pieces of melamine shelf material, 36" x 8"
- 14 screws, not longer than two of the shelves stacked together
- 4 adhesive felt pads
- A saw that can cut at an angle (i.e. a chop saw, skil saw, table saw, or hand-saw)
Note that the dimensions here are really not critical. You should have a look at the design here, but make it work for you and your gear. This design is very flexible and can accommodate all kinds of different sizes.
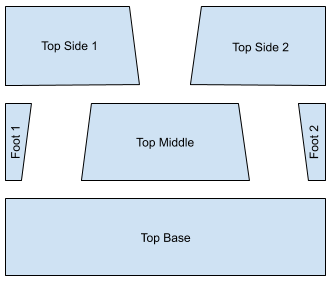
First off, you need to make the cuts. The angled cuts are all 7.5 degrees. This makes it so the shelf will tilt toward you at this angle, and the top parts of the shelf make 15 degree angles (30 degrees total).
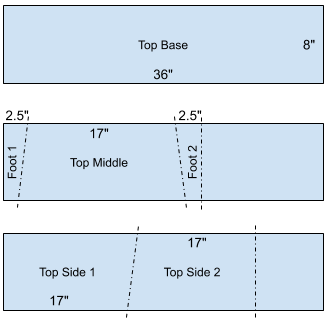
After making the cuts, you should have the following pieces:
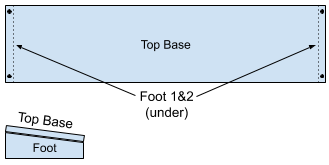
Put the two foot pieces on the ground angled side up, and lay the top base on top of them. Position the feet so they are at the very ends of the top base, and put two screws in each. Drilling first and countersinking for the heads is imperative in this project, so the screw heads are flush with the surfaces.
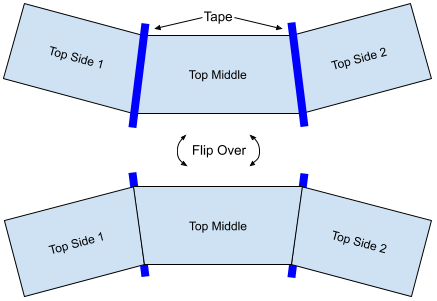
Now lay out the desk top on the floor or another flat surface. Get the three pieces lined up perfectly and join them with some tape. Then flip the three over.
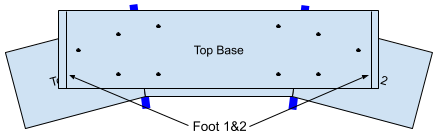
Next, lay the top base with the feet attached upside-down on the top pieces. Ensure the thick part of the feet are on the convex edge (the far side from you) of the desk top. Attach the top base to the top pieces using screws -- four in the middle piece, and three in each side piece. I offset the top base back an inch or so since my computer keyboard and trackpad would be under it right there, and I wanted to make sure there was plenty of room for my fingers.
Add some felt pads to the bottom of the feet, and that's it! Enjoy having a more ergonomic setup.