Knobbler - The Pursuit of an Auto-Labeling Control Surface for Ableton Live
I'm a big fan of purposeful physical interfaces to computer interfaces for the same reason why I'm a big fan of fully keyboard-controllable apps (bonus points for modal interfaces and a bias for the home row – 'vi' for the win!). When we can use our whole hands, including fingers, we are easily an order of magnitude more productive compared with the single point and click nature of using a mouse or touchpad. I'd wager it's more like two orders of magnitude in terms of real value, given the much lower friction between thought and action. Our bodies are the limiting factor of our turbo-speed, parallel processing brains.
Musicians know this all too well. "Real" instruments are perfectly tactile engineering feats. Think about a saxophone or violin – they are built to be played by humans with bodies and limbs and fingers. Multiple aspects of the body are engaged to produce sound and to express emotion.
Ye Olden Days
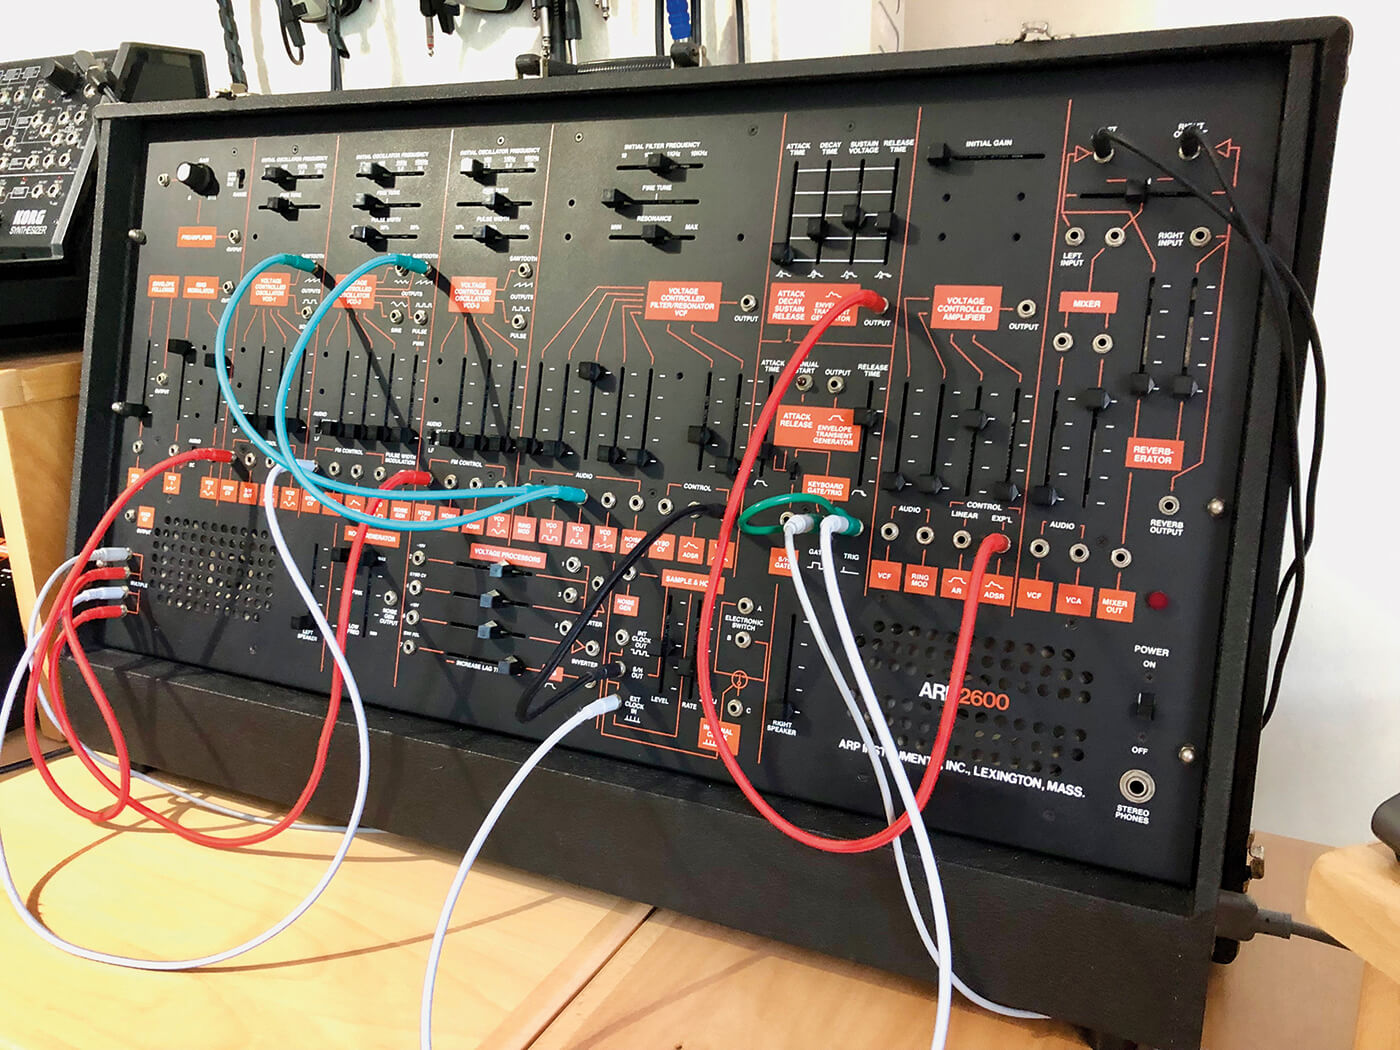
Electronic instruments started out as very necessarily tactile, due to the absence of microchips and dot-matrix character displays. The early synths were capacitors, resistors, transistors, switches, and potentiometers soldered together by hand. Sound adjustments had to have a knob or switch dedicated to that adjustment. It just had to be that way.
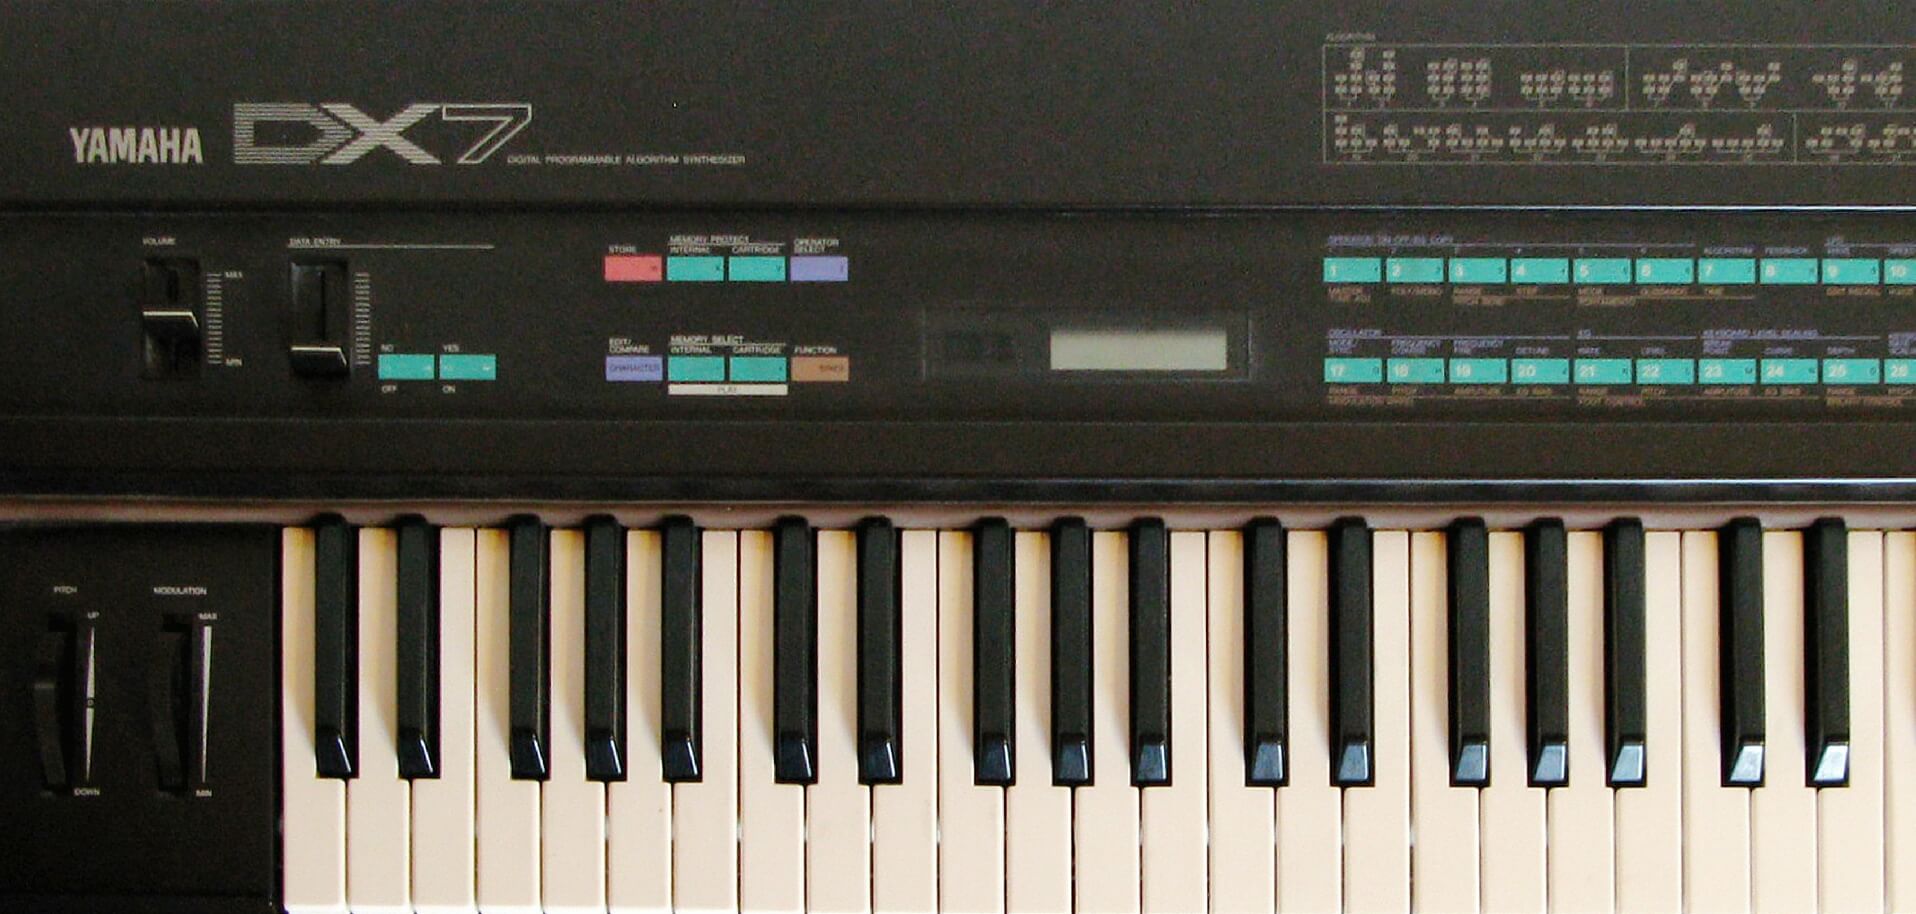
The digital age of the 1980s replaced knobs and switches with buttons and menus. Crafting sounds evolved into programming sounds – from a hands-on experience guided by feel, to a cerebral experience guided by a mental model of a menuing system. Knobs were replaced by buttons. Some of the most popular synths of the 80s even had absolutely awful buttons, with little to no tactile feedback. A prime example of this is the Yamaha DX-7, which was used in probably half of pop songs of the time.
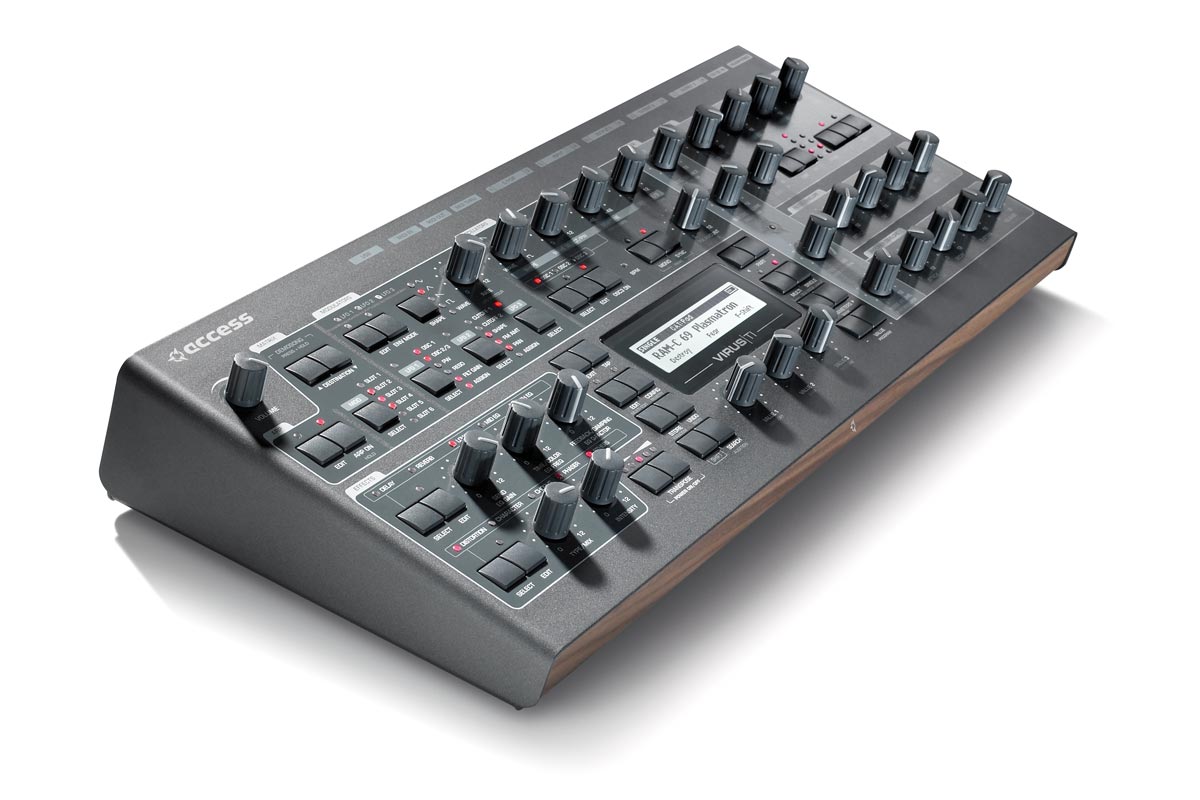
As with most evolutions and trends, the pendulum swung back and we started to see hybrid approaches in the late 1990s. With modern digital technology, knobs and switches could inform a CPU of how they were being twiddled, and the CPU could respond by transforming a sound accordingly. This "Virtual Analog" came about because tactile interfaces are just better. We haven't seen buttons-only mass-market offerings since.
Modern Times - Analog vs In-The-Box
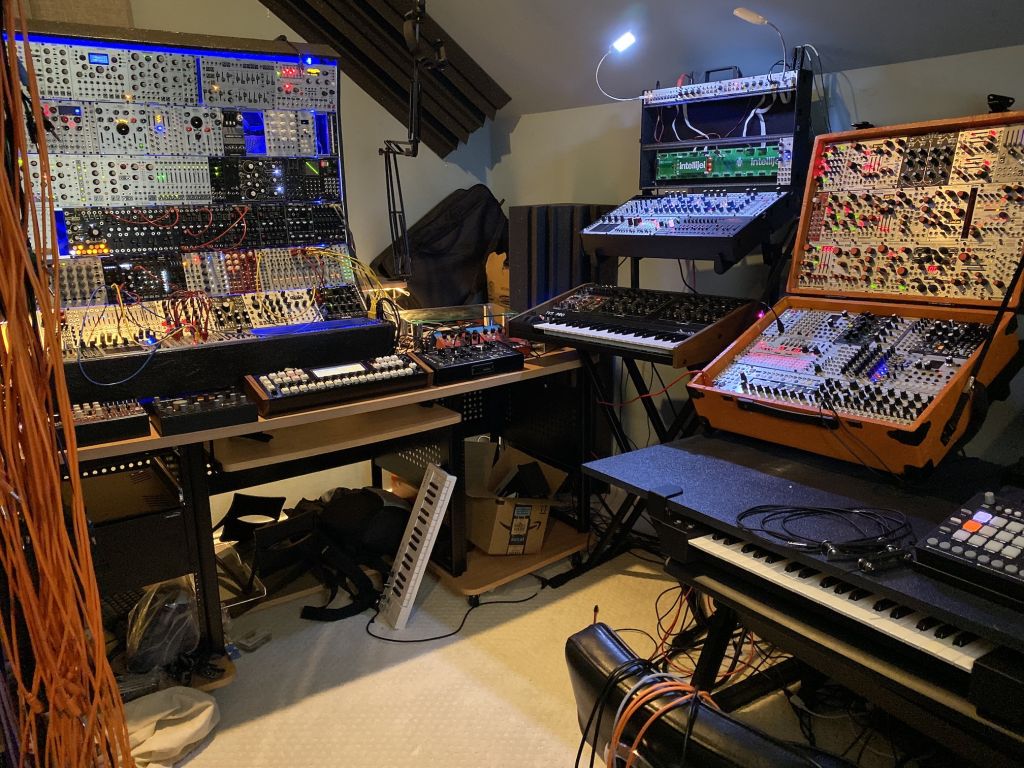
The current state of things (2020s) allows for an interesting and distinct split in how music is made. There is a portion of musicians that are very much on the pendulum as it continues to swing back to the analog world. This is a gorgeous and temperamental world. It has a reality and clarity that no digital reproduction could ever hope to match. It is constantly drifting out of tune and components fail randomly, necessitating a PhD in multimeters. It requires money, time, and space allocation in order to thrive.
The other side of today's electronic musicians are the "in the box" crowd. (Full disclosure: I am very much a member of this crowd.) These musicians use modern computers, which are able to faithfully simulate elaborate studios full of analog and digital music equipment. Every sound generation and processing step is inside of a computer. However, the best we have to interface with a computer is a keyboard and mouse. Kind of like playing a saxophone using just a single chopstick. Not good!

A benefit of this methodology, aside from obvious space considerations, is that it enables musicians to work on several projects at once and switch between them instantly.
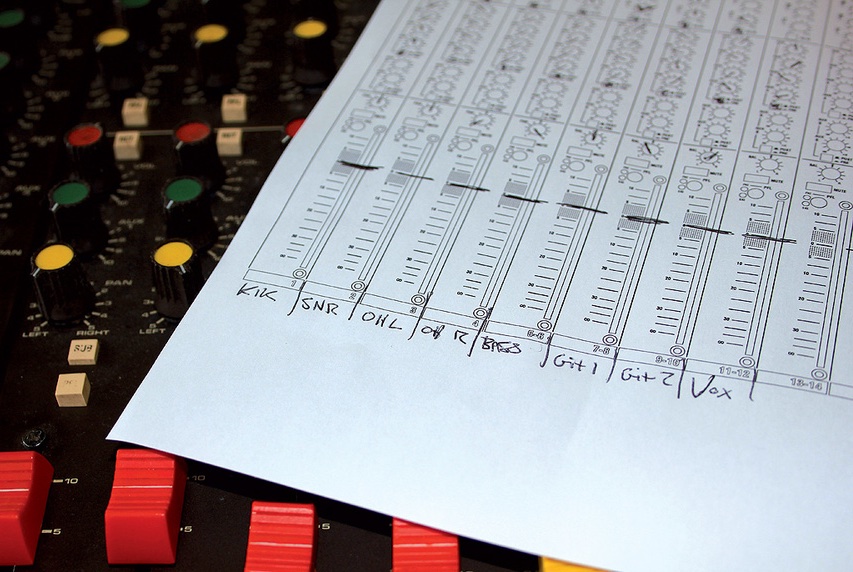
For an analog musician to switch between projects, they would have to ensure every knob and switch in their studio is reset to its proper setting for the project at hand. This can easily become hundreds of objects that need to be in some physical state in order to "get back to where we were". Some analog equipment comes with photocopiable parameter sheets, where settings can be written down for later recall. The horror!
So here's where we bring these two concepts together. The intersection of physical interfaces and in-the-box philosophies is an interesting one. Physical interfaces can be classified by whether they serve a specific function or are general purpose. The line is blurry of course, since any physical interface will have certain limitations that may make it unsuitable for some purposes, but let's not worry about the gray area here.
Physical Interface Approaches
Specific vs. General Purpose
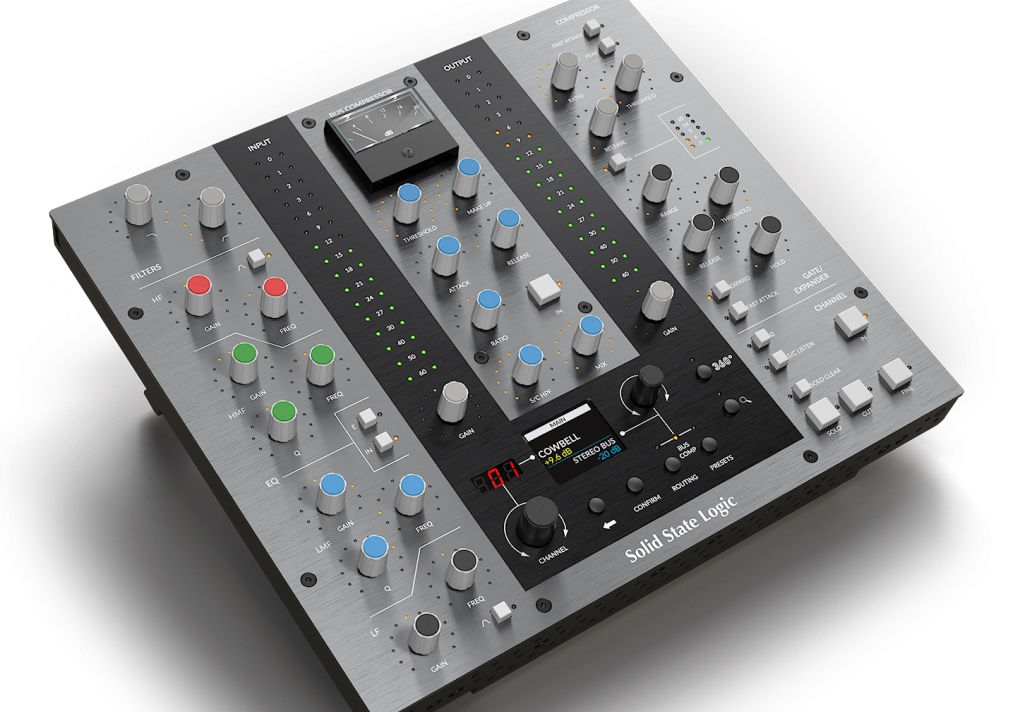
An example of a purpose-built interface would be something like SSL's UC1 hardware. SSL has a long and revered presence in music production, going back 60+ years of being a key piece of a large portion of iconic music (Beatles, Doors, etc). The UC1 exists to provide a familiar tactile environment to people who are either used to their actual analog mixing desks, or who have a high regard for SSL's choices in arranging these controls. This is a specific solution for a specific use case.
Because the possibilities are so wide open with in-the-box music production, no single physical arrangement of buttons and knobs can work for every project, since each project can essentially be its own distinct composition and configuration of a full recording studio. This necessitates general-purpose controllers. A general purpose controller will offer an array of tactile controls (buttons, knobs, sliders) and the musician can "map" one tactile controller to some software instrument or effect parameter. This now becomes a prioritization and organization exercise, since the number of physical controls is finite, and the number of things to control approaches infinity.
Finite vs. Infinite Knobs
There is one aspect of the physical nature of these tactile controllers that I feel is very important. There are two distinct approaches that manufacturers take. The most common approach is to use fixed range knobs with a physical marking on the knob showing its position. This presumably is connected to a variable resistor or potentiometer, who can report on its absolute position. When flipping between projects or sounds, the position indicated by the knob may not actually match what is currently configured for that parameter or sound. Unless there is a motor attached to that knob, it will almost always be indicating the wrong value. To me, this is a fatal flaw that makes fixed range knobs a non-starter for in-the-box music making.

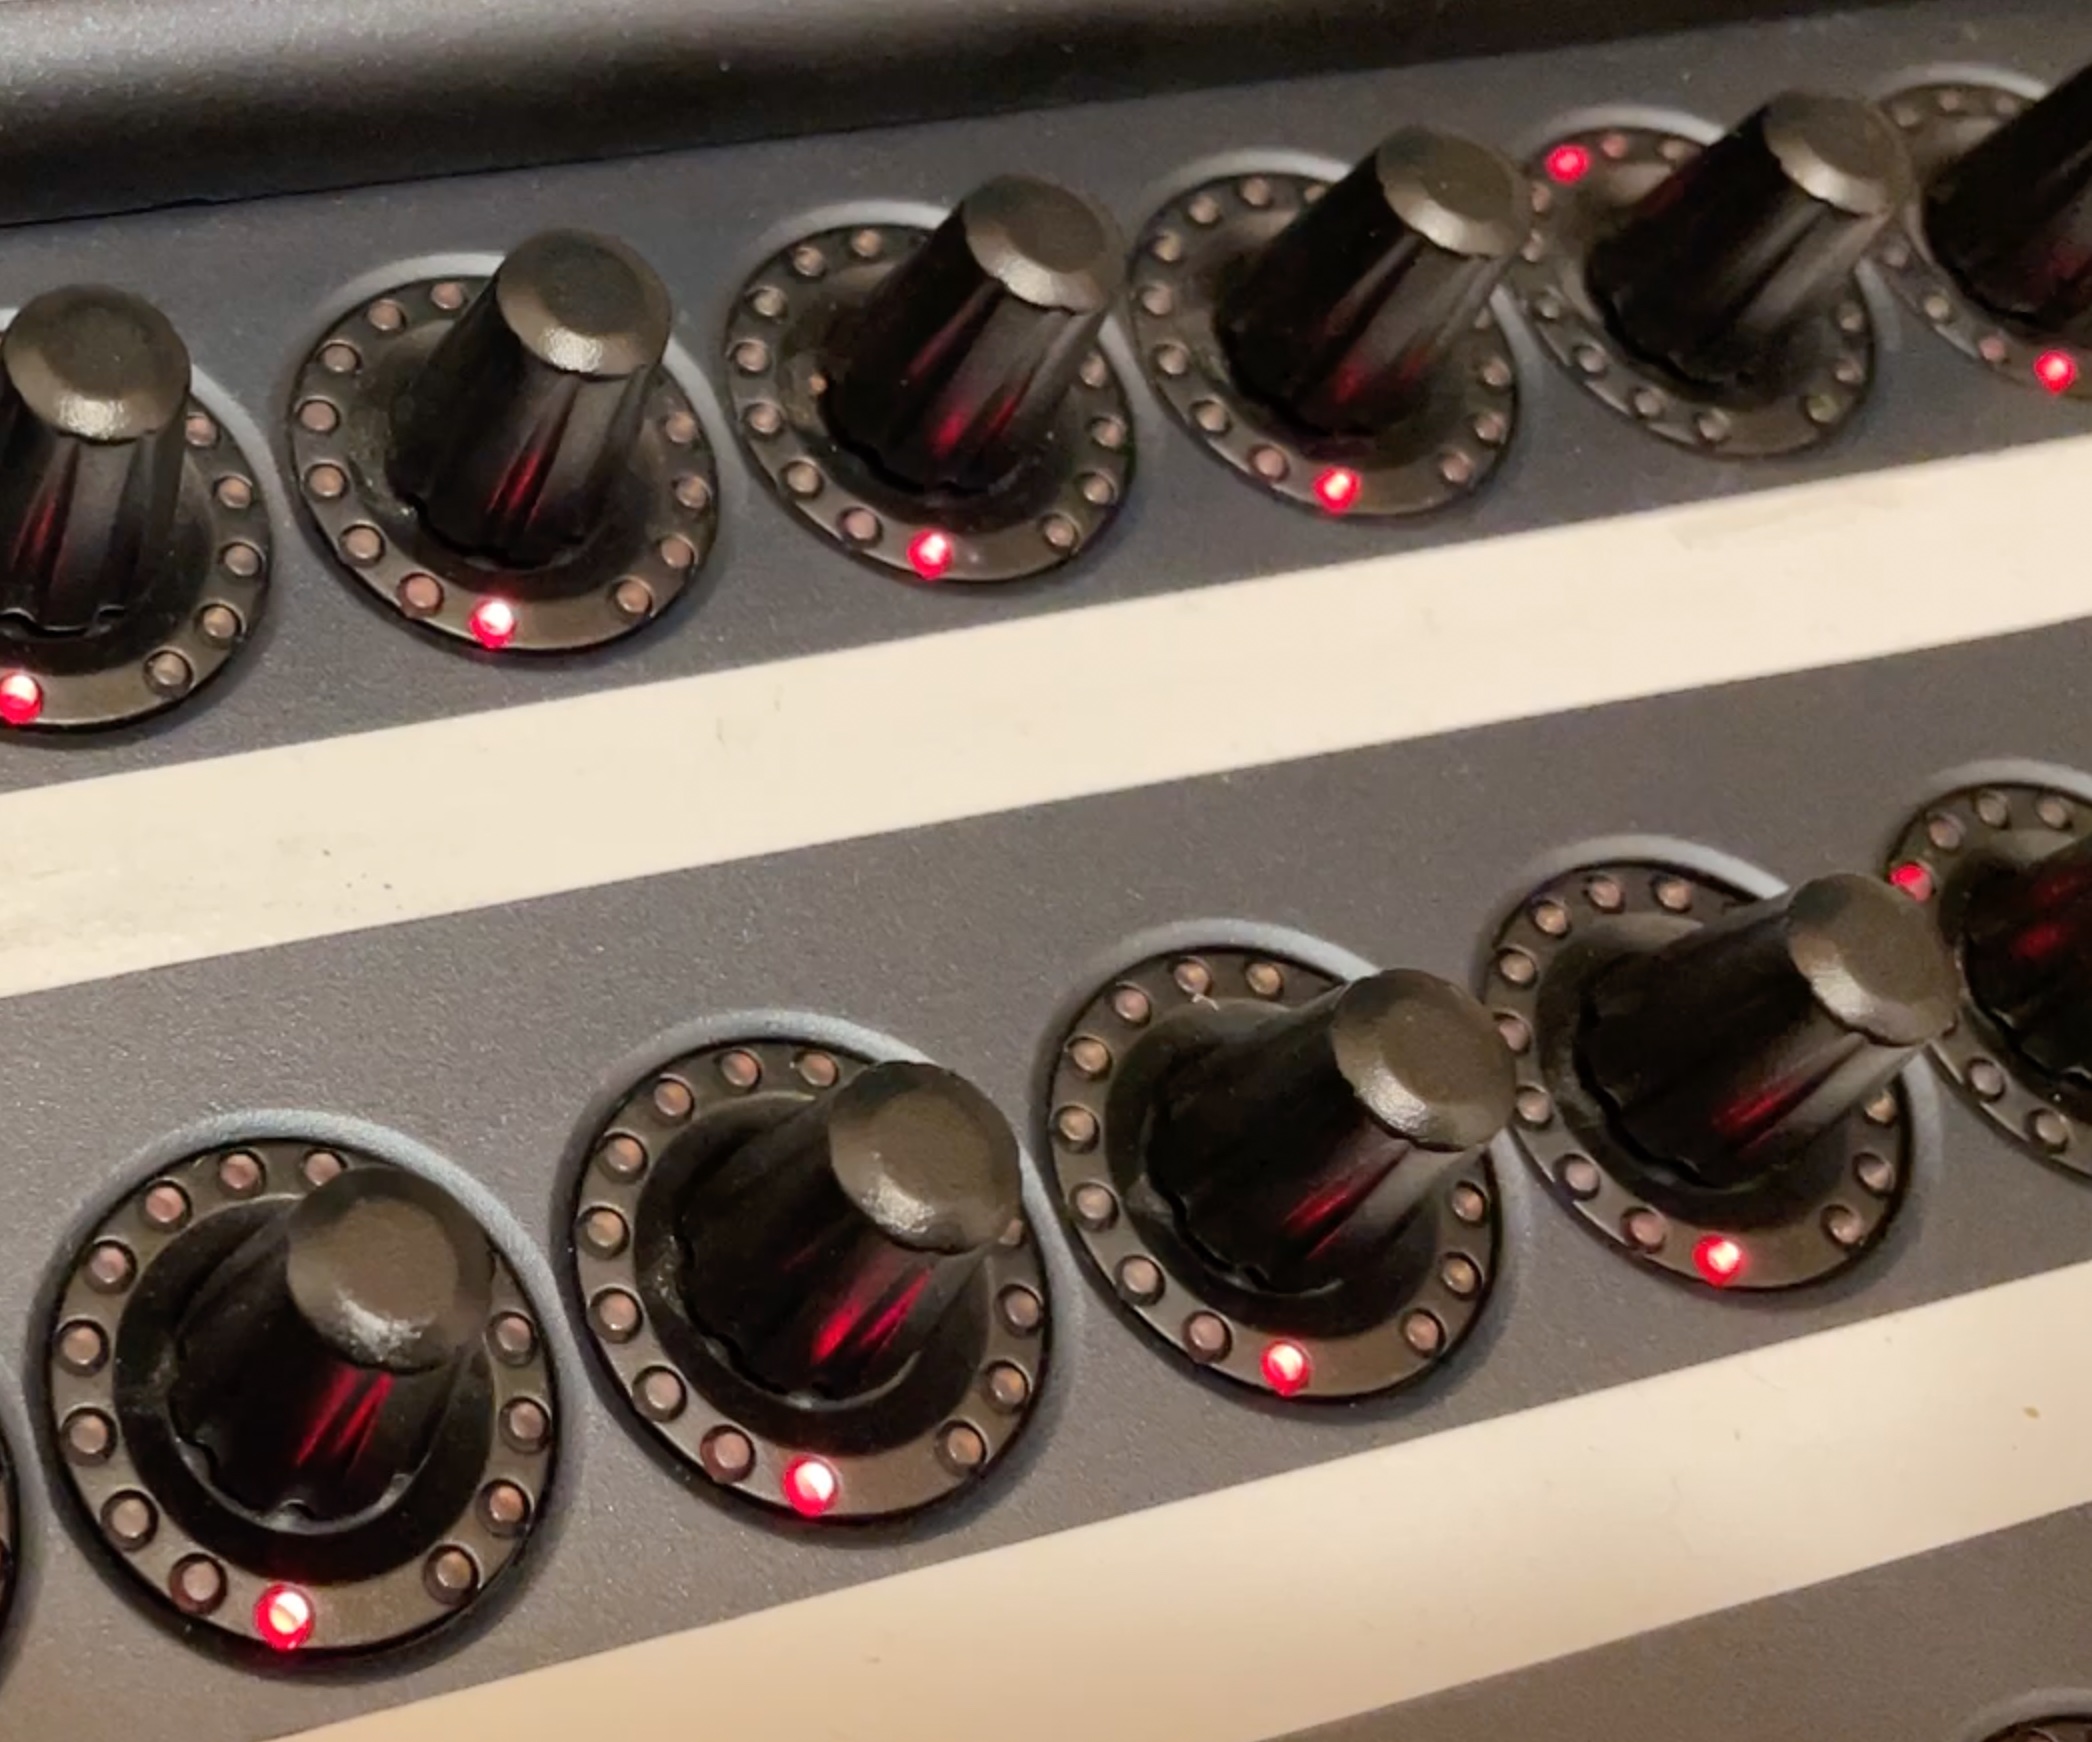
The better approach is to use illuminated "endless" knobs. The knob is surrounded by a ring of lights that can be used to indicate the current value of a parameter. Twisting the knob always increments or decrements that current value, so the knobs are always showing the right value. There is no physical start or stop point for the knob. At minimum value, the indicator just will not move any lower. Similar for upper bound values – you can keep turning the knob but the value will not exceed the maximum.
A good example of this has been around for quite a while. It's the Behringer BCR-2000. It has 32 endless knobs, 8 of which have integrated button functionality, and 20 more dedicated buttons. Each knob and button emits a distinct MIDI continuous controller (CC) message, so mapping these physical controls to parameters in software like Ableton Live is a piece of cake. Cmd-M (enter mapping mode), click a parameter on the screen (indicate what you want to map), twist the desired knob (indicate what to map it to), Cmd-M (exit mapping mode), done.
Memory Game
The only shortcoming of this device is that it quickly becomes a sea of parameters stretching 32 knobs far and wide. I have been using a BCR-2000 for several years now, and I bought some dry erase tape and a marker so that I could write what each knob was controlling under each knob. While in a project, this works fine. But switching between projects exposed this sin against the in-the-box commandment that thou shall be able to switch projects instantly.
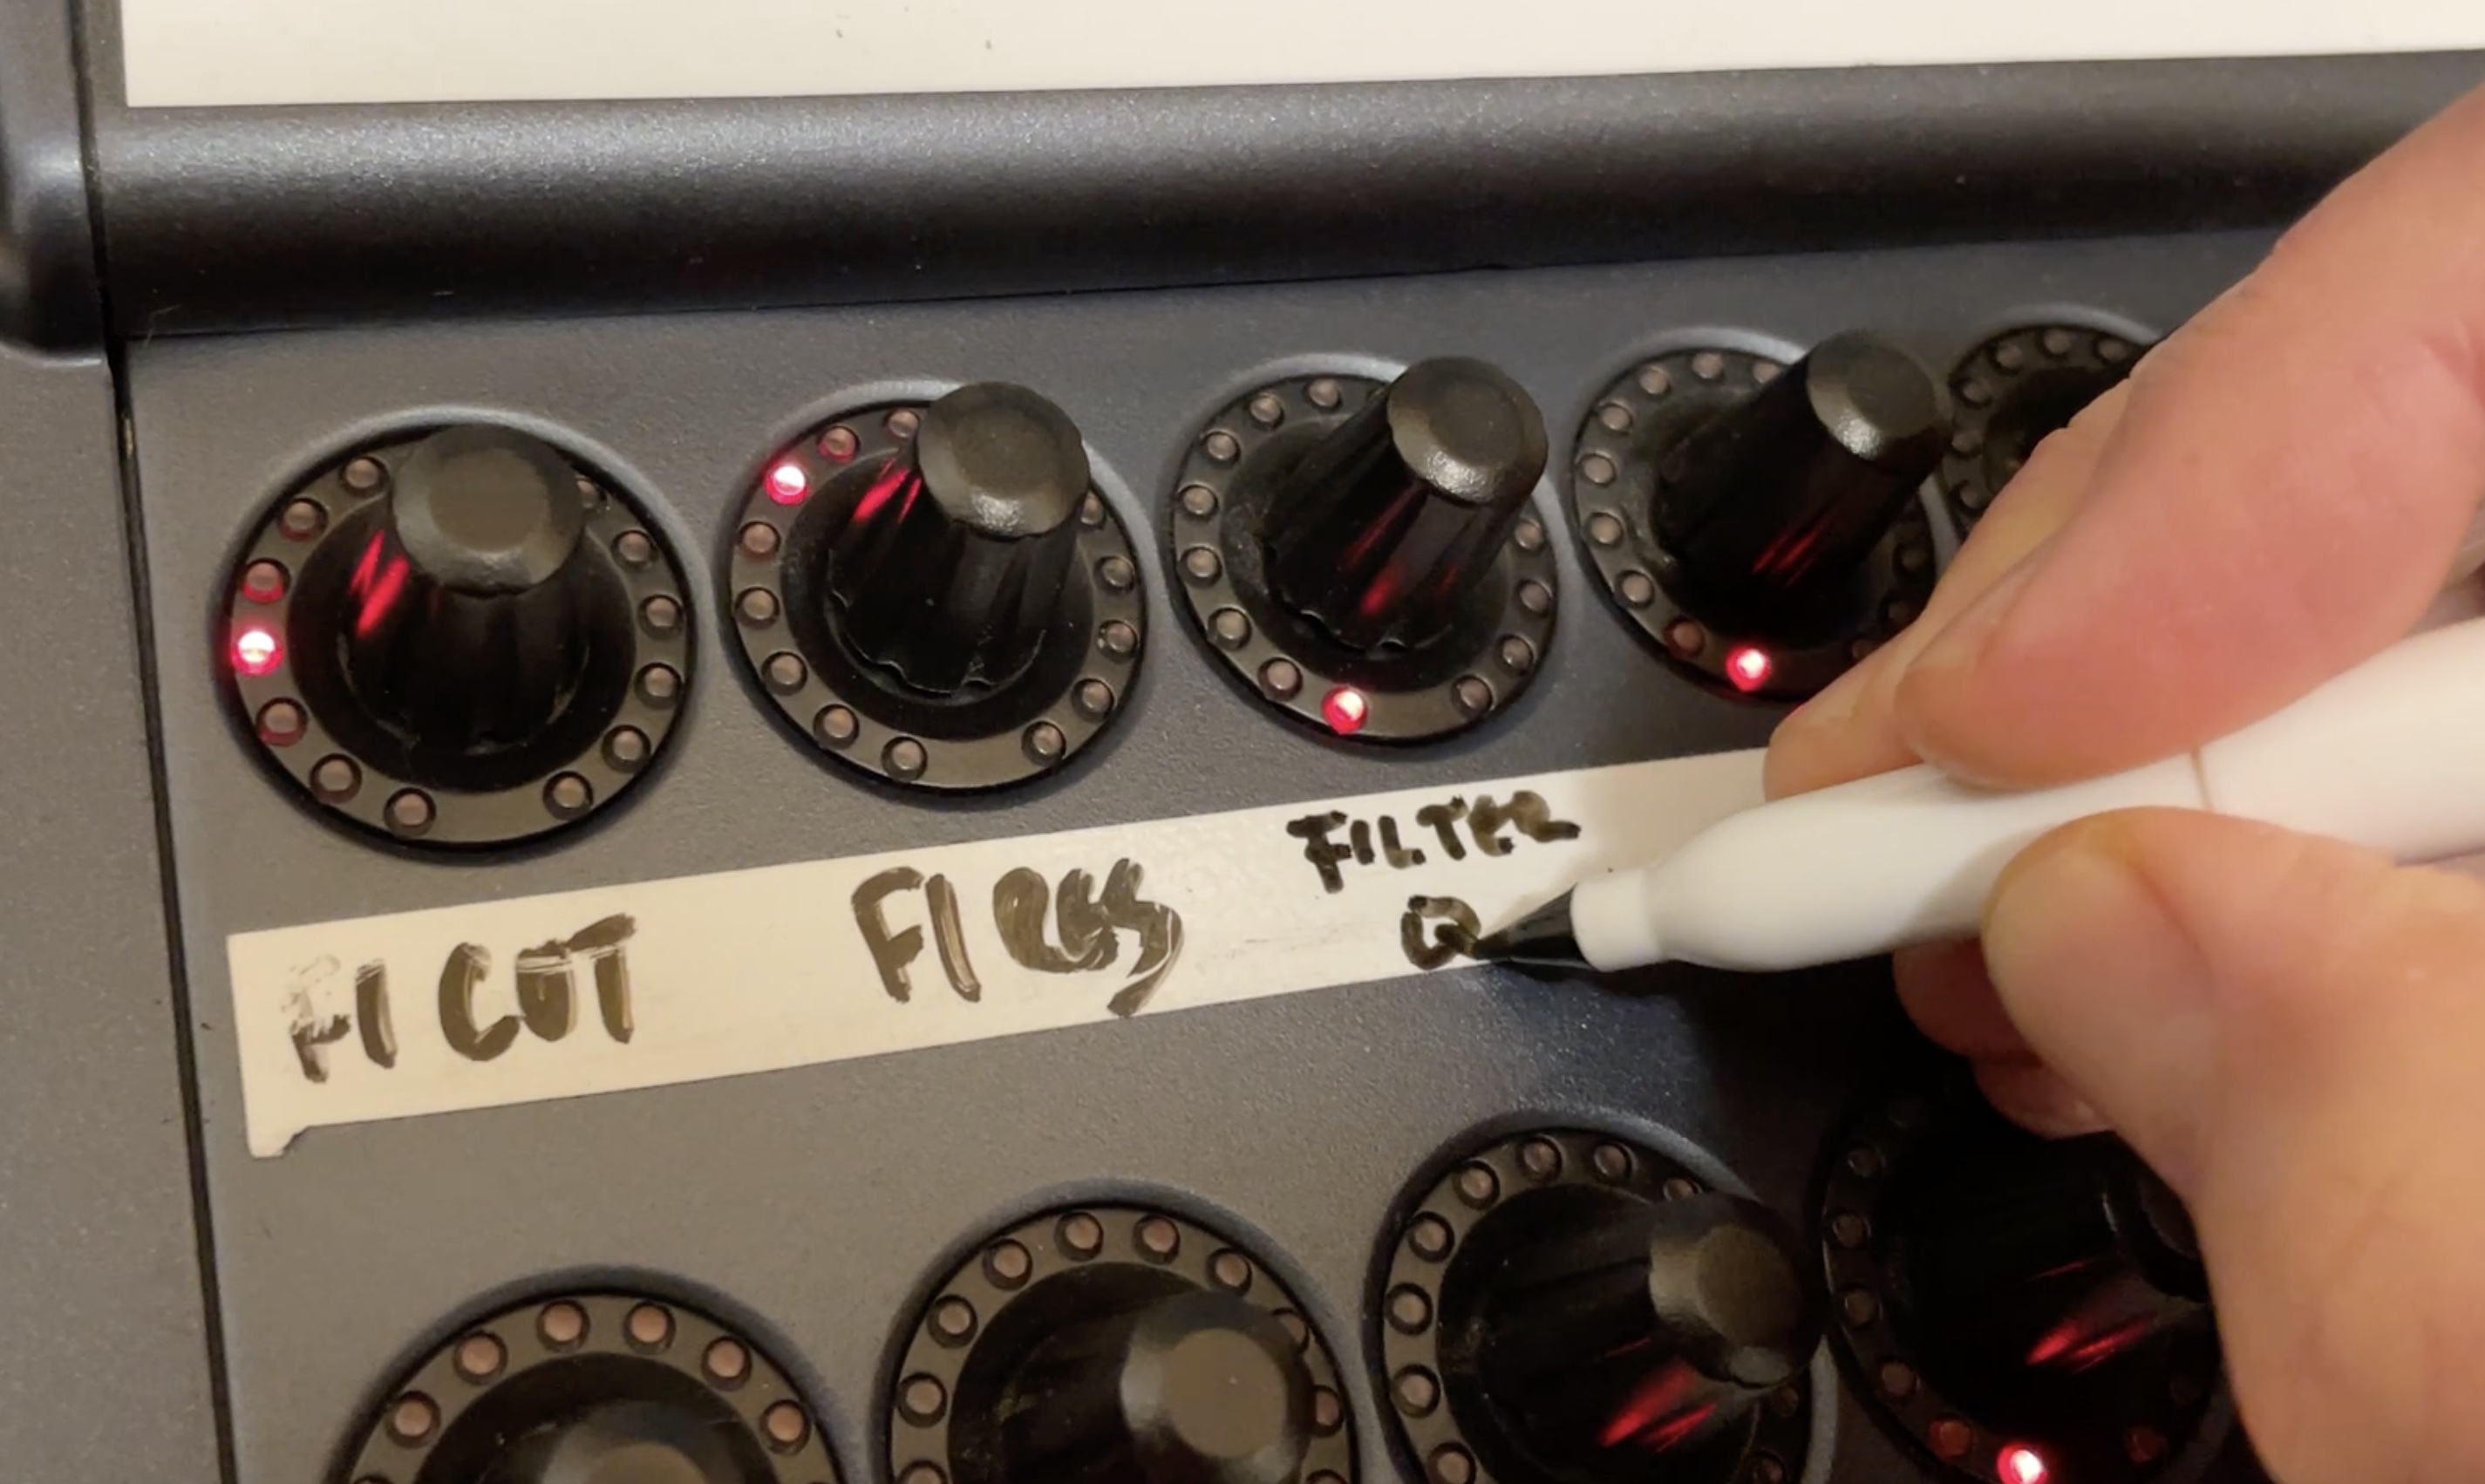
The BCR-2000 was still the best compromise of functionality and productivity, so that's how I worked for several years. Erasing the dry erase surfaces on it was always a pivotal moment – either I had finished something and moved on, or I had given up on something and wanted to really move on. Working on multiple projects was challenging, though.
I always wished the BCR-2000 had a small text display above each knob where I could put the name of the thing that the knob was controlling. Upgrading my computer to one that was no longer fully compatible with the BCR-2000 was the final push I needed to do something about it.
Enter The iPad
I had the idea to use the TouchOSC software to build a UI for my iPad, and somehow integrate it with Ableton Live directly using a Max For Live device that I make, so that the control surface could be aware of what it was controlling.
Sidebar: TouchOSC is a tool for building any tactile user interface you can imagine and mapping the UI controls to send MIDI, OSC, or other types of messages. Apple products have the built-in capability to send and receive MIDI data over WiFi, so TouchOSC on iPad is oftentimes used as a control surface for what is going on in a Mac nearby. Even better, you can run the TouchOSC editor on the Mac (big screen) and have it actually run the UI on the iPad as you build it, everything working. It's a great development experience!
This ended up being a little easier that I expected, mostly because I found some good shortcuts along the way. The first thing to decide was the feasibility study for the critical functionality of having something on the Ableton Live side update a label next to a knob on the TouchOSC screen. It was easy to build a little proof-of-concept to make the computer send a simple OSC message like '/label1 Foobar' that would update the 'label1' object to say 'Foobar' on the iPad's screen.
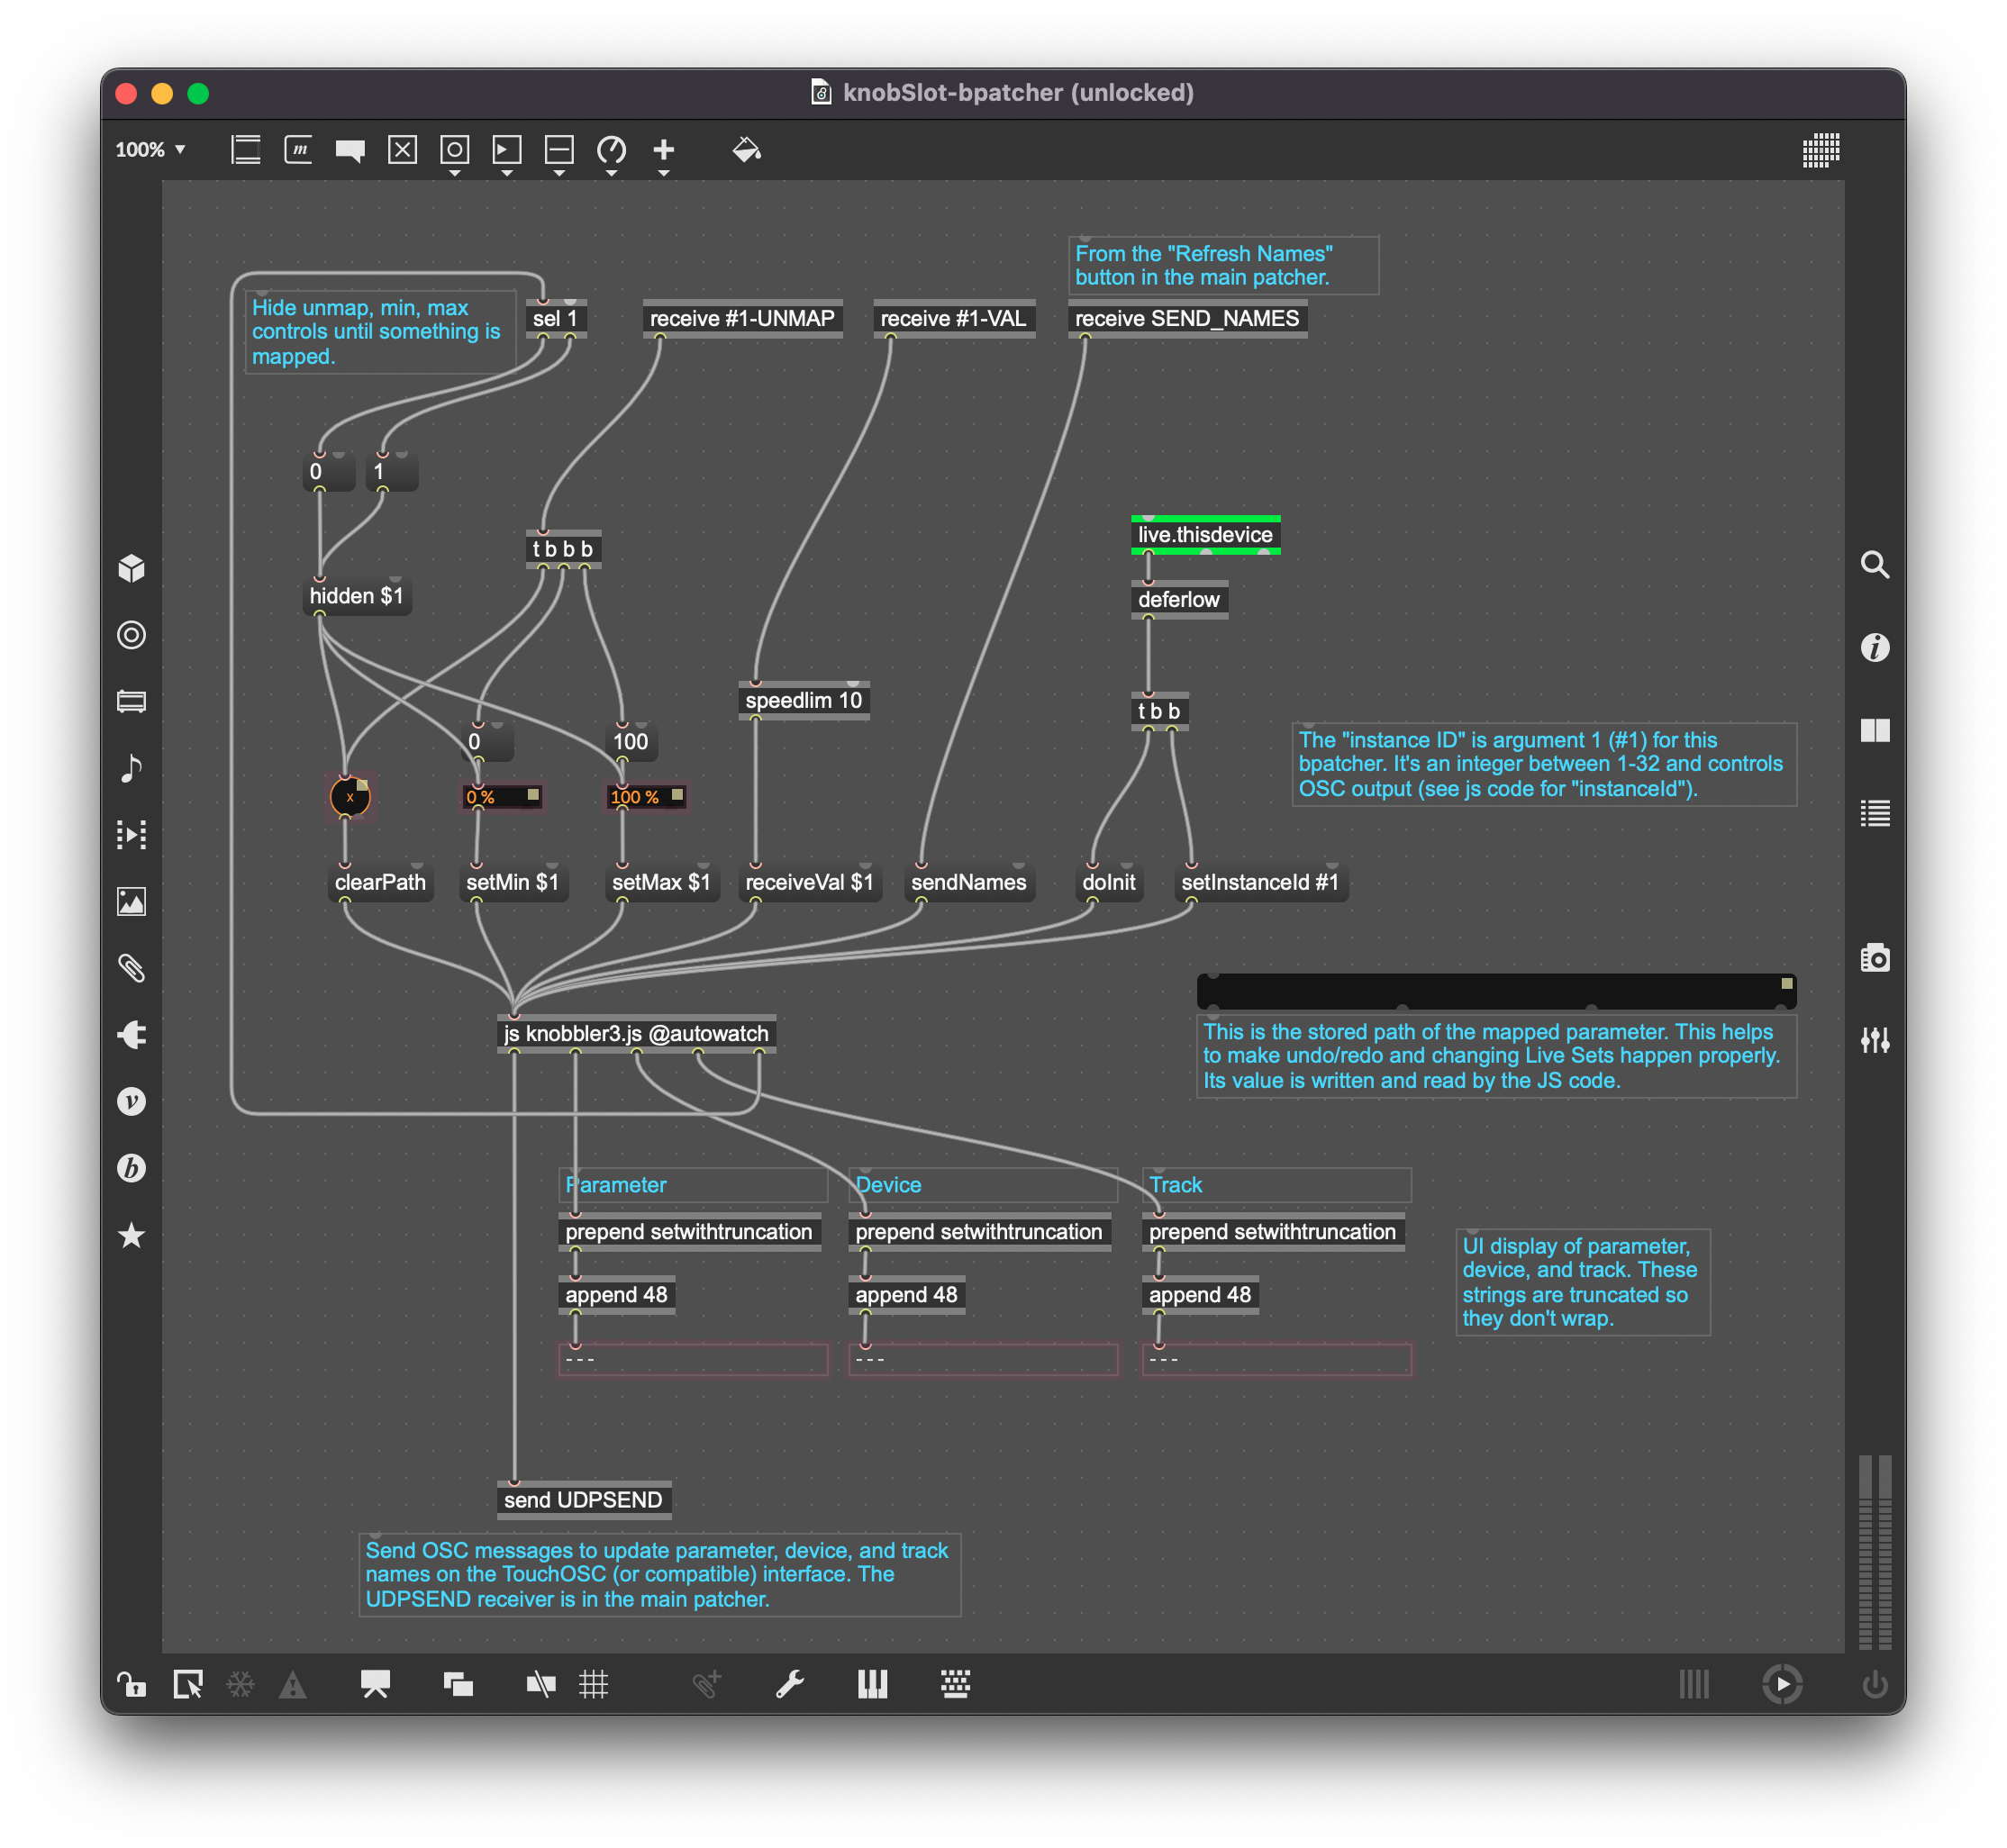
The next thing to figure out was how to send an OSC message from Max For Live. I found the udpsend device in Max, and it's already tailored for sending OSC messages. There is a good example in its help panel showing how to configure the destination host/port. A quick mockup yielded success.
The final challenge, which I mostly punted on, was to figure out how to make a Max For Live device that could map a number box to a device parameter. After some searching, I had the idea to just open up the stock Ableton LFO device and copy the mapping bits out of there. Lo and behold, it worked with minimal fuss.
I had a fully functioning prototype, but then I had another idea that felt even better.
Next Level Efficiency
Part of my personality is that I'm always looking for micro-efficiencies. It doesn't matter if I'm doing the dishes or solving complicated software problems, my brain is always on the hunt to reduce the number of necessary steps in a process, especially if they are human steps. This is especially important when in a creative flow state, since having to switch out of creative mode and think like a computer can spoil the flow.
So the big idea was that I realized that I could turn the existing process of mapping a control to a parameter inside out to eliminate a few steps in the process. If a control on the TouchOSC surface is currently unassigned, and you touch it, it could just map to whatever the currently selected device parameter on the screen is. This eliminates the need to switch to the track containing the Max For Live device to initiate the mapping, to enter mapping mode with Cmd-M, then return to where in your set you started.
This approach further simplified the implementation of my device, which was an extra bonus.
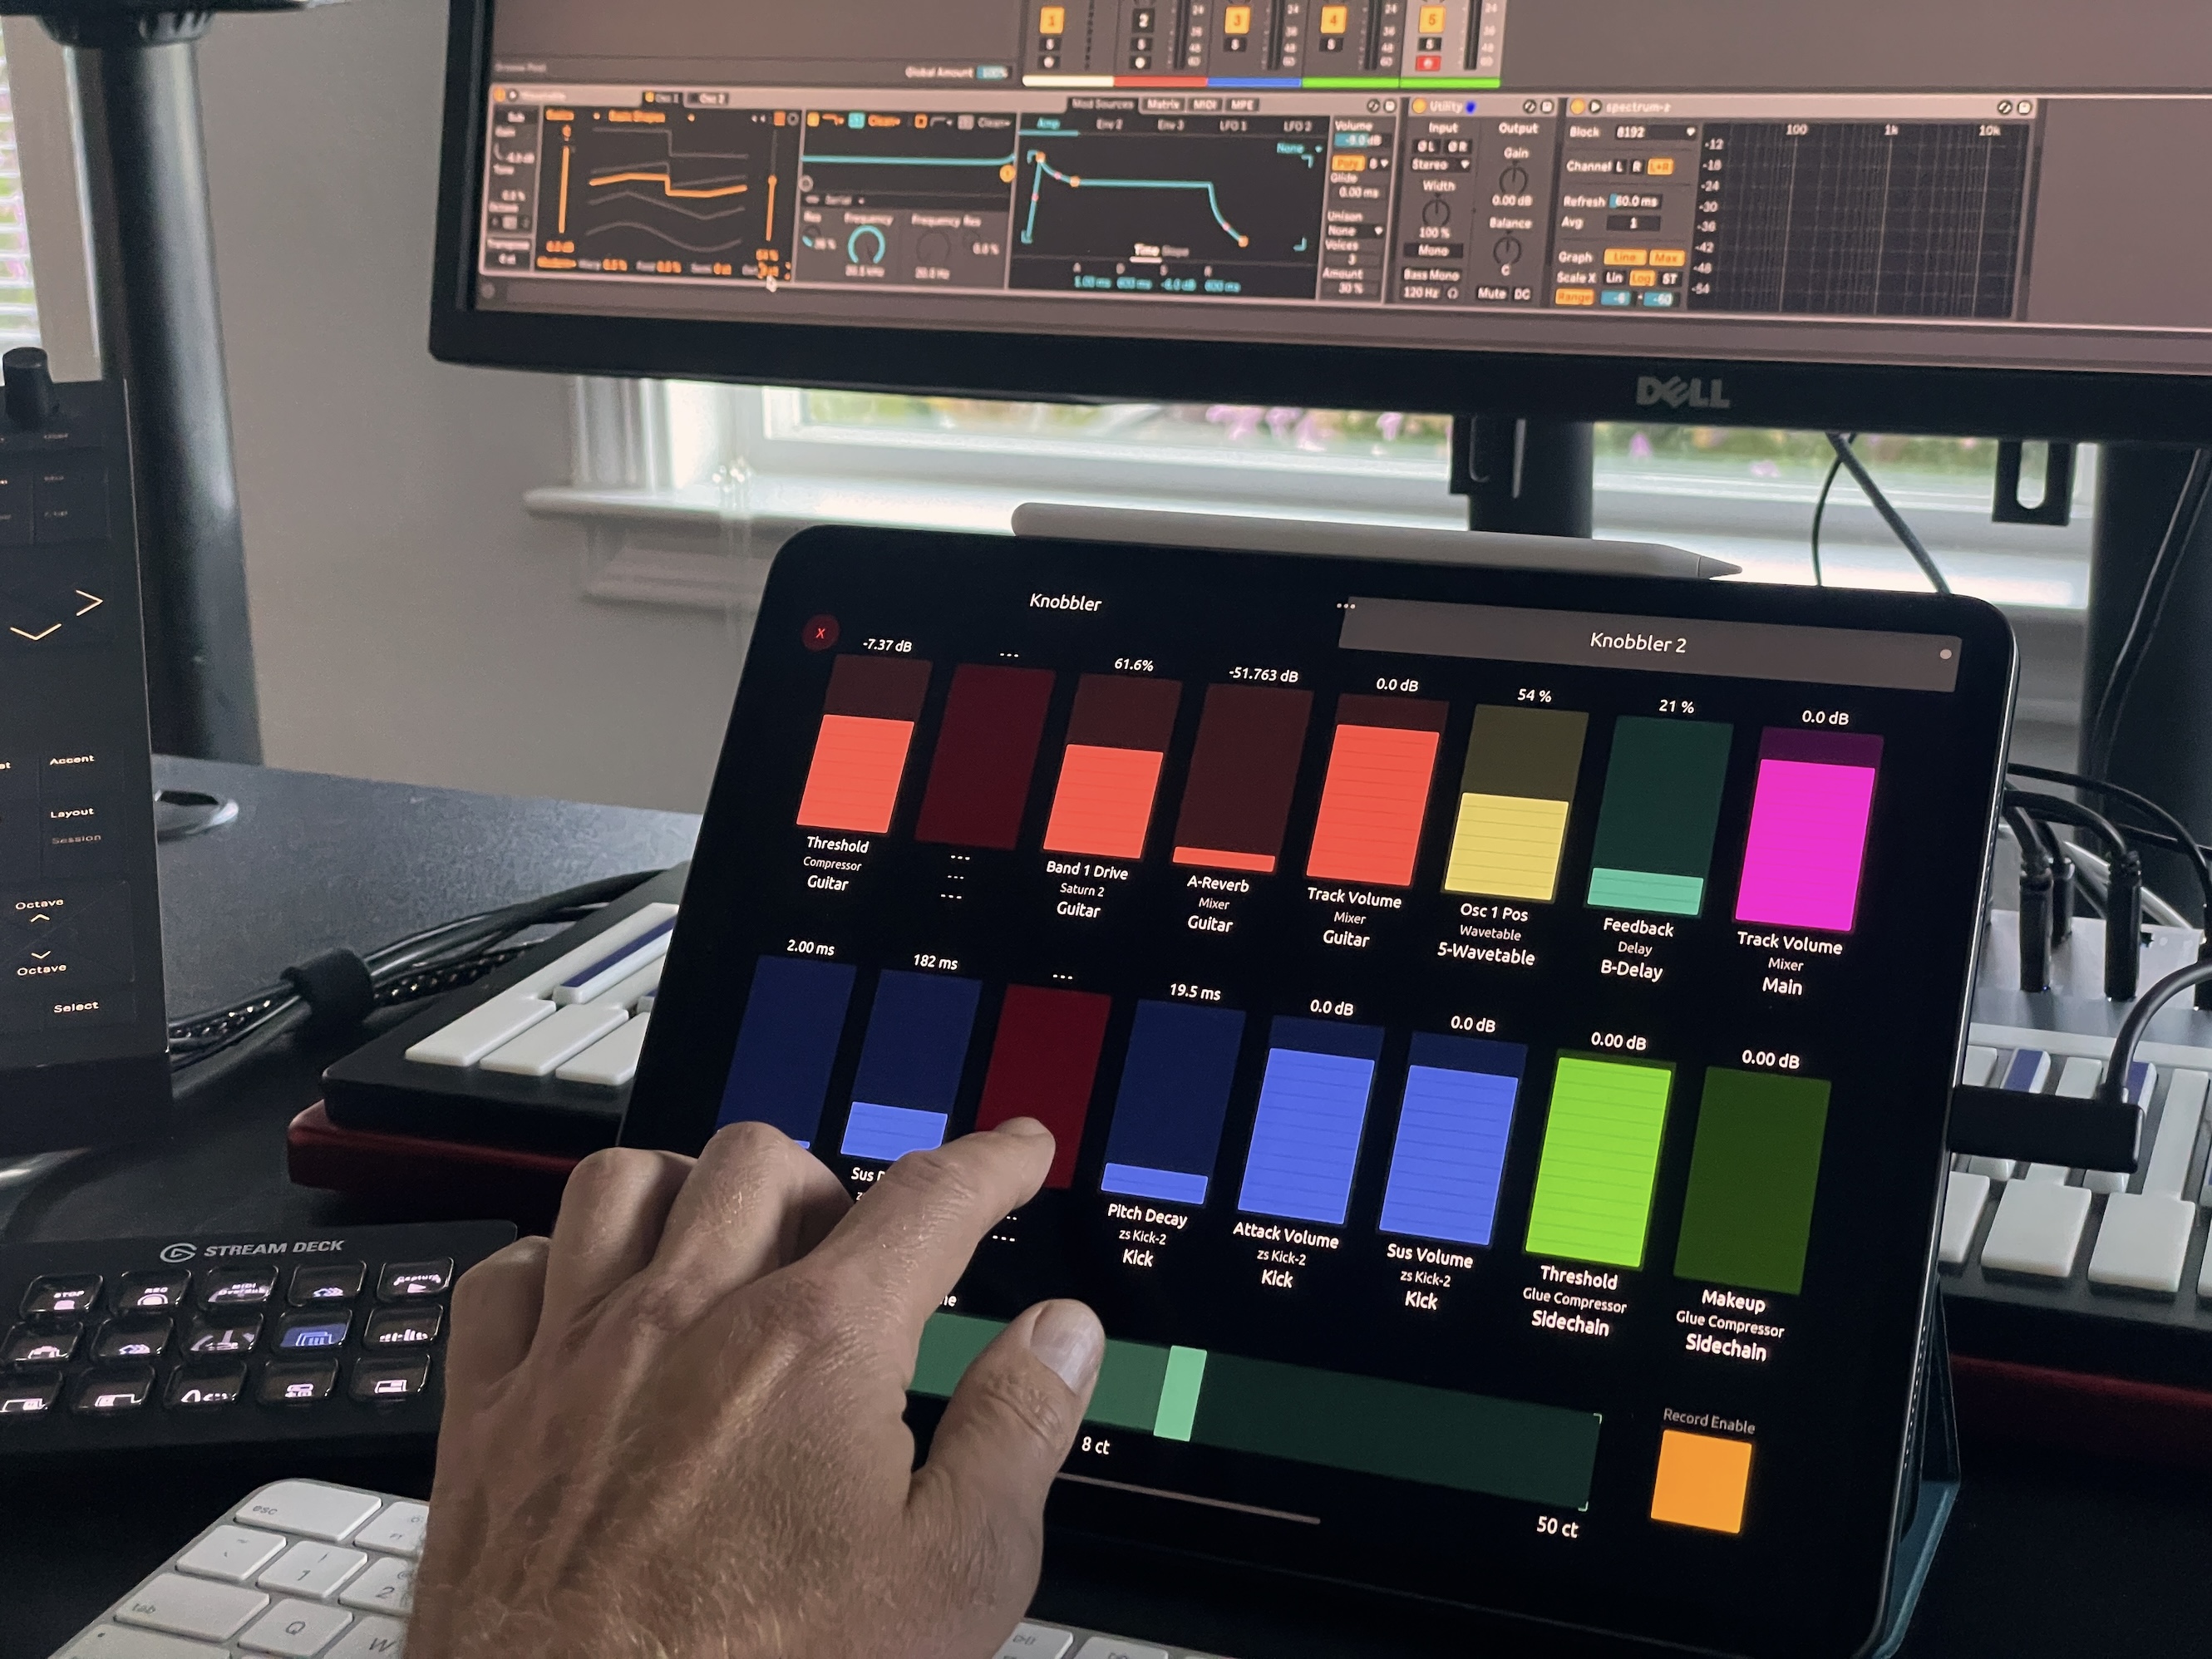
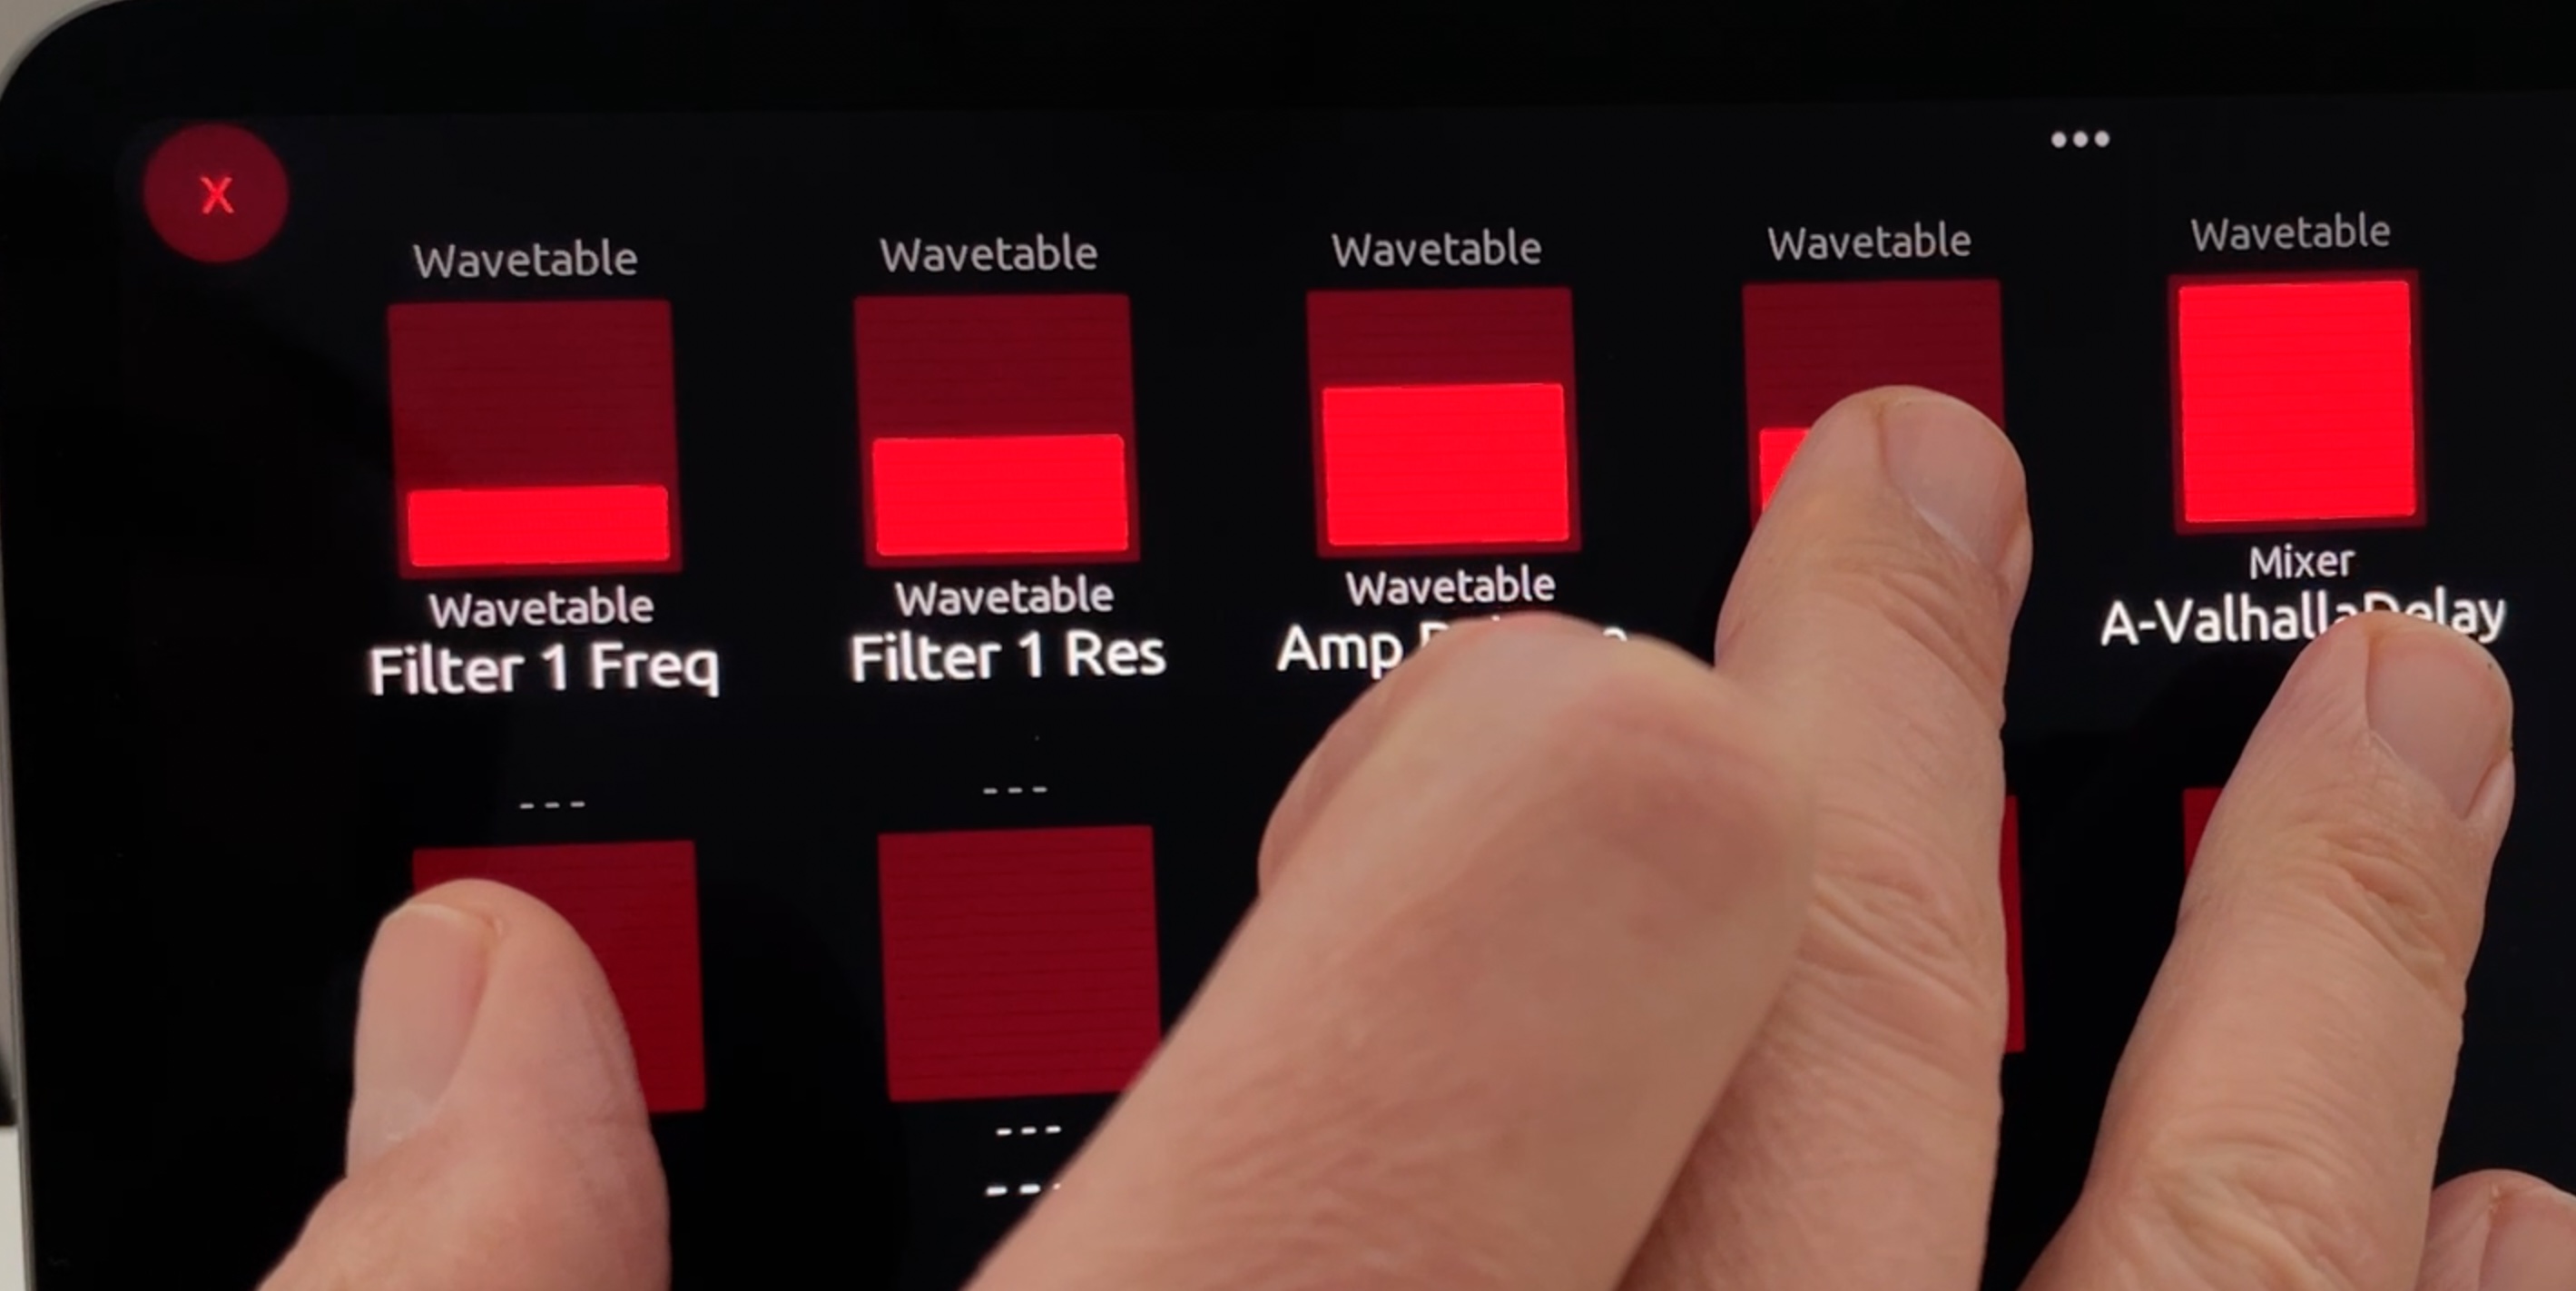
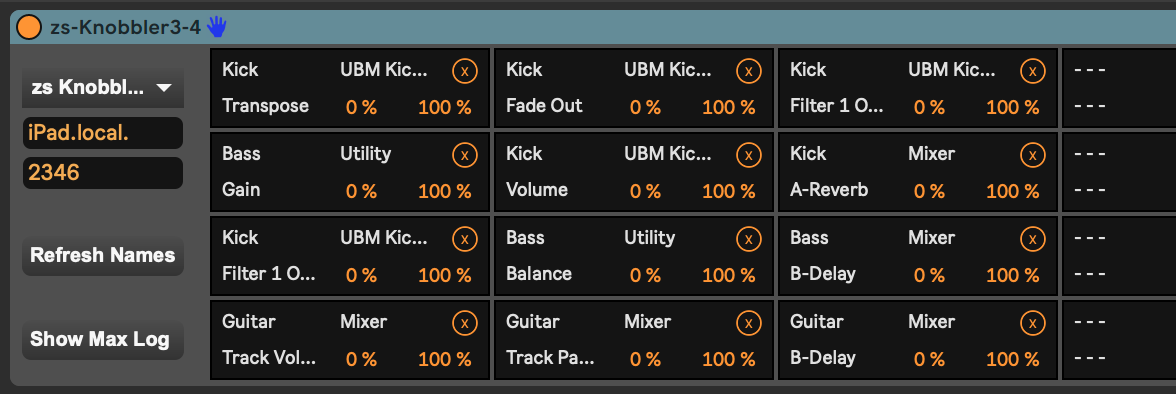
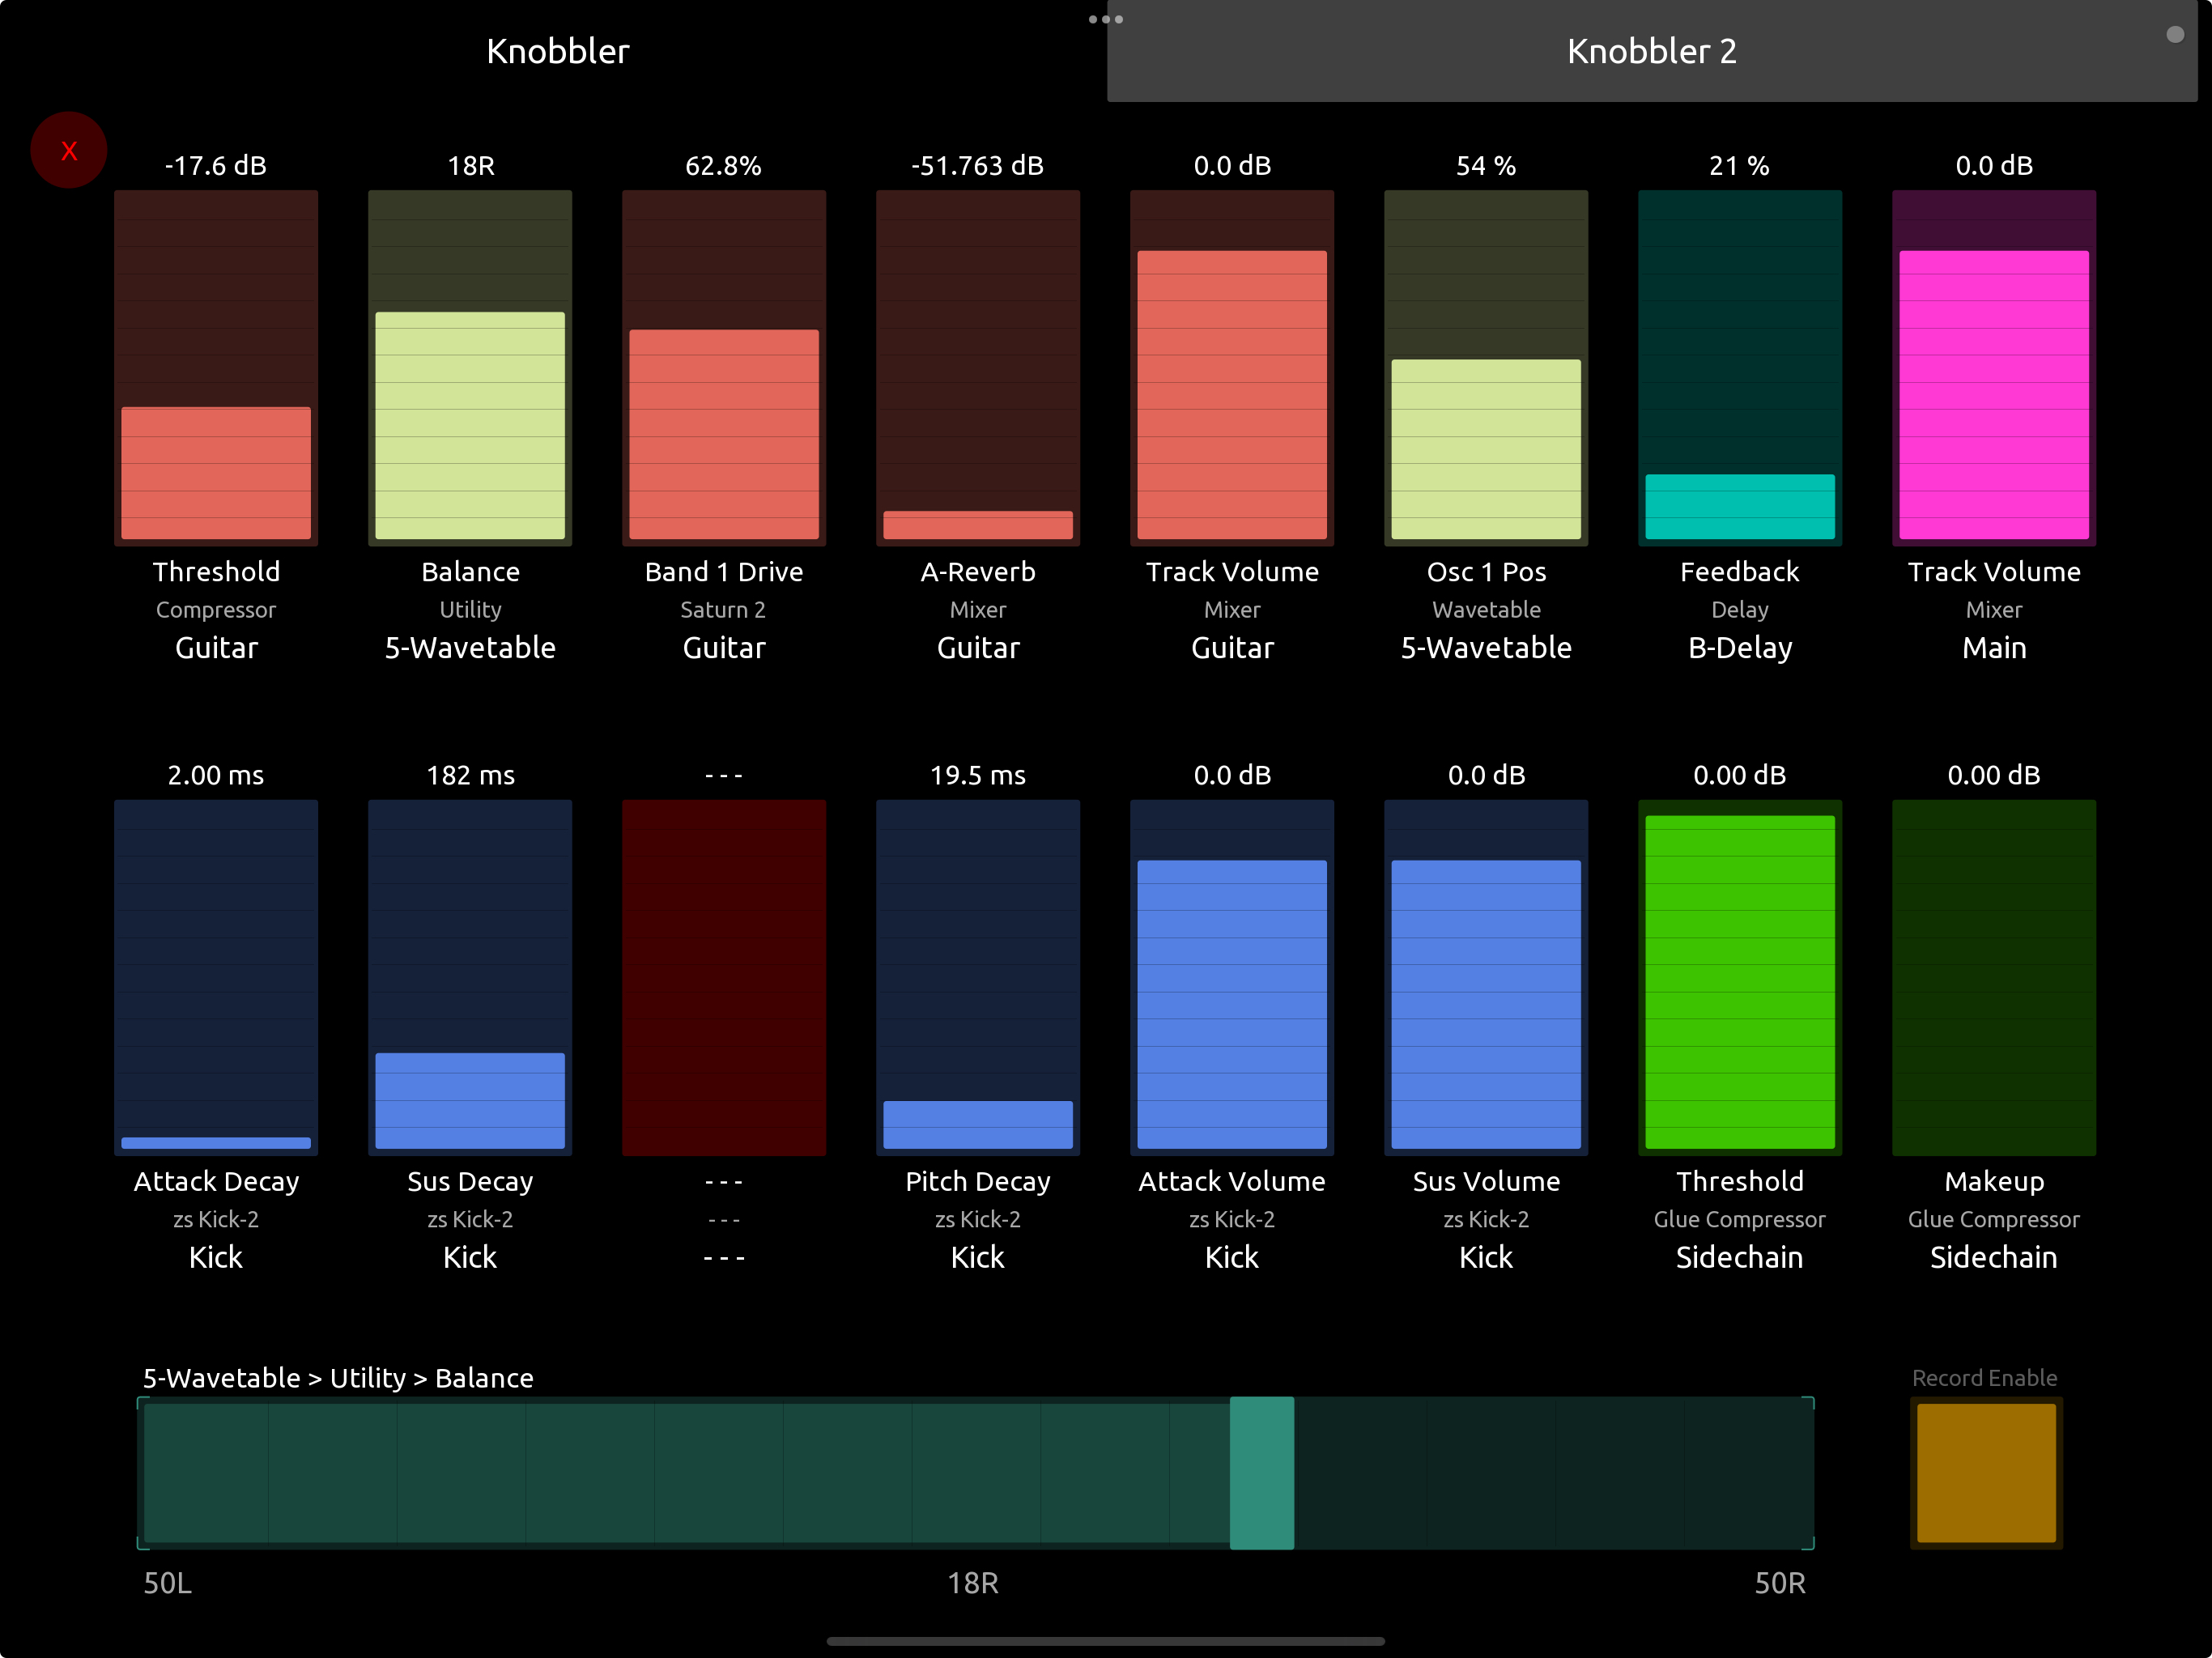
So in the end, I have made a Max For Live device that sits quietly out of the way, that communicates with a TouchOSC control surface via the OSC protocol. This surface has 32 assignable faders. Click or change a parameter in a Live device, then touch one of the faders, and now that fader will control that parameter on that device. Process = minimized. The mapping is saved with your song, so switching between projects is also a zero-effort step.
Finished Product
Download, Setup, and Usage
The project page on GitHub will always have the latest download links and installation/setup instructions. Head over there for the details.
Wrap It Up Already
Like pretty much any other learning experience, this was a mostly fun, sometimes frustrating experience. I learned so much about Max for Live, OSC, TouchOSC, Live's initialization sequence in doing this project. I've already benefited enough from this work to make the time investment pay off, and I hope others can benefit from it too. Visit the GitHub project page you are interested in using it, and if you have ideas to improve it, please send them my way!