Faderboard Version 3
This post details a significant update to my original Faderboard device for Ableton Live. I finally made time to learn enough Max for Live to do this in the way that I always wanted.
The prior version worked fine, but changing sounds was very cumbersome, requiring updating the sample loaded into 8 Simpler devices. This new version uses a single sample "drop zone", and offers some nice usability and capability improvements.
Demo
Here is an instance of zs-Faderboard3 playing the example sample, sent through a Pedal device then into Valhalla Supermassive on the "We Are Stardust" preset.
The demo shows off the device's loop management abilities too, including seamlessly transitioning from forward playback to reverse. It also shows a visualization of each voice's place in their journey through the sample.
Get Started
First, download the latest release of zs-Faderboard3.amxd
After downloading, you can then add the device file to your User Library in Ableton Live, or directly into a MIDI track. You can then drag a sample onto the "Drop Sample Here" area. The .wav file below is a nice example to start with. You can also drag a clip directly from an Audio track in Ableton Live to the drop zone.
- Download Harmonic Flights- D3.wav
Set the root note for your sample. For example, the above sample is rooted at D3.
Then move any of the Gain sliders from -inf Db to a positive value to start playing the sample at the pitch indicated above. The sample is triggered as soon as the Gain slider moves off of it's zero position.
You can also set each voice to its own left/right panning location.
touchOSC Integration over WiFi
UPDATE 2024-09-25 -- An alternative to using the specific TouchOSC template is to use my Knobbler4 device/template. It's a generic auto-labeling, auto-coloring parameter control surface that works for all devices in your Ableton Live set.
If you have an iPad and a Mac, you can use the software touchOSC to create a set of virtual controls to control zs Faderboard3 over wireless MIDI.
Here's a long demo showing how that can work:
Download the touchOSC definition here:
You can then configure touchOSC on the iPad to send MIDI over "Network Session 1".
- In the touchOSC editor page, click the little chain icon in the top row, next to the wifi icon.
- Ensure
Connection 1is checked, and click the down arrow on the right side of that row. - That should reveal a
Send PortandReceive Portoption. - For both
Send PortandReceive Port, touchBrowseand chooseNetwork Session 1
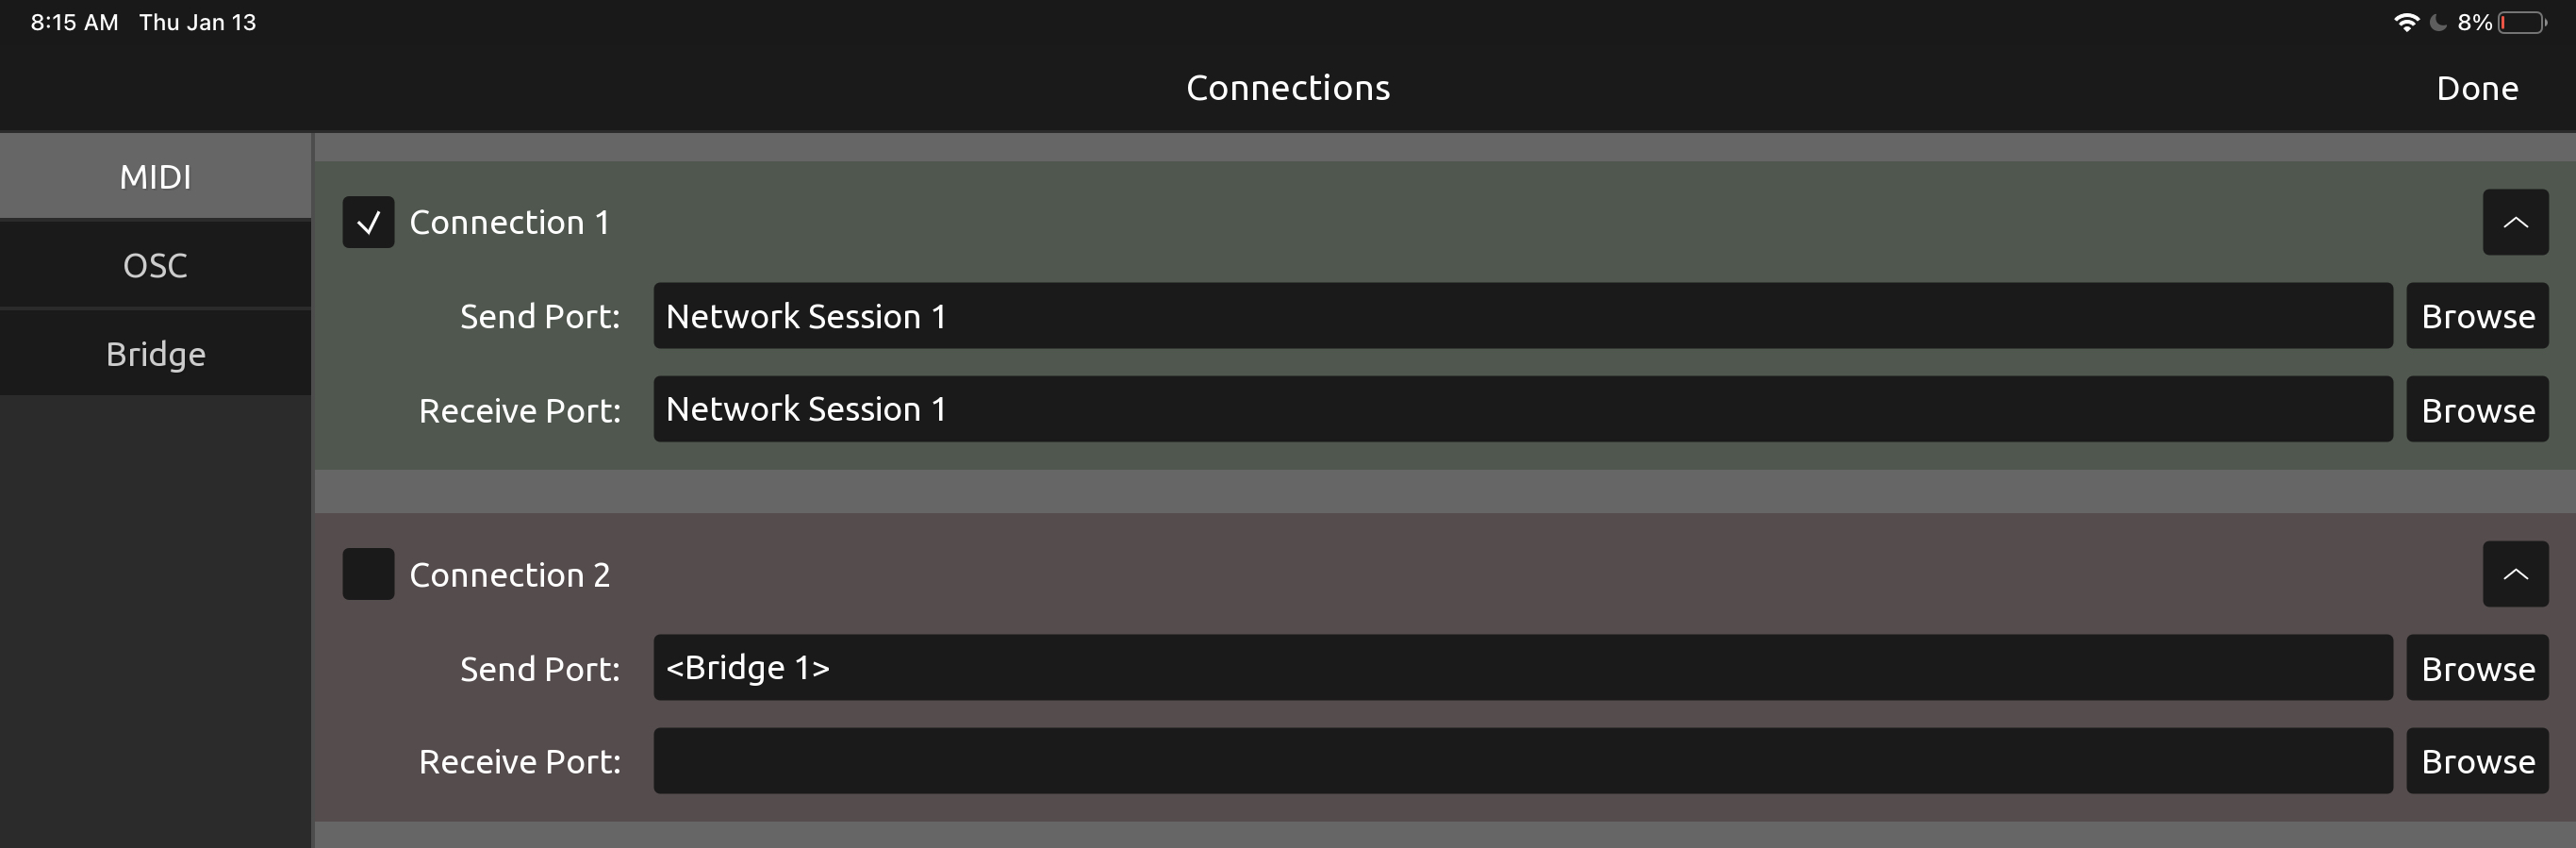
After you tap Done, touchOSC will send messages over network MIDI.
To set up the Mac to receive the network MIDI data, follow these instructions:
- Ensure touchOSC is open on the iPad
- On the Mac, open the app
Audio MIDI Setup - Click the
Windowmenu and chooseShow MIDI Studio - Click the
MIDI Studiomenu and chooseOpen MIDI Network Setup... - If the
My Sessionspanel is empty, click the+button to create aSession 1 - Check the checkbox next to
Session 1 - In the
Directorypanel, click your iPad, then click theConnectbutton
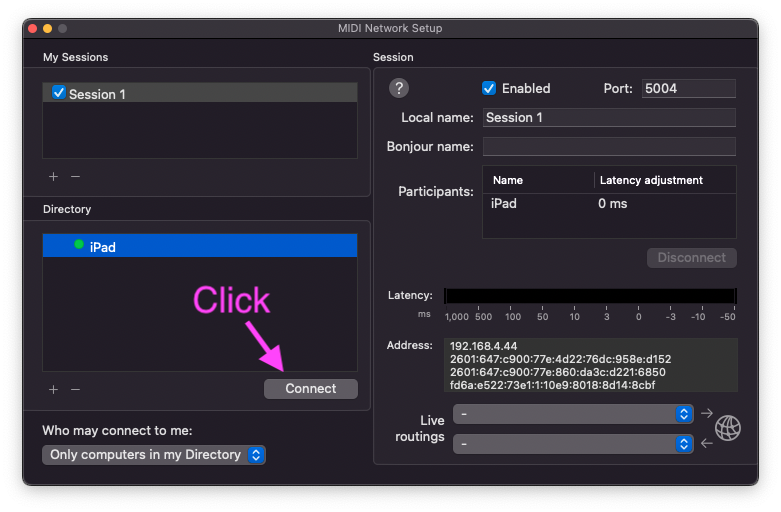
Now the iPad and the Mac can exchange MIDI messages over wifi!
To enable MIDI control over WiFi for touchOSC in Ableton Live, follow these instructions:
- Open Ableton Live
- Open Preferences (
Cmd+,) - Select the
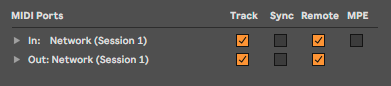
Link / Tempo / Midipanel - In the
MIDI Portssection, ensure theTrackandRemotecheckboxes are selected for BOTH theIn: Network (Session 1)andOut: Network (Session 1)rows.
Now you can map the controls in touchOSC to device controls in Ableton Live as you normally would, by using Cmd-M to Map Midi. Because of how it's set up above, the communication is bi-directional, so moving a control on screen with your mouse should move the control on the touchOSC UI on the iPad.
How It Works
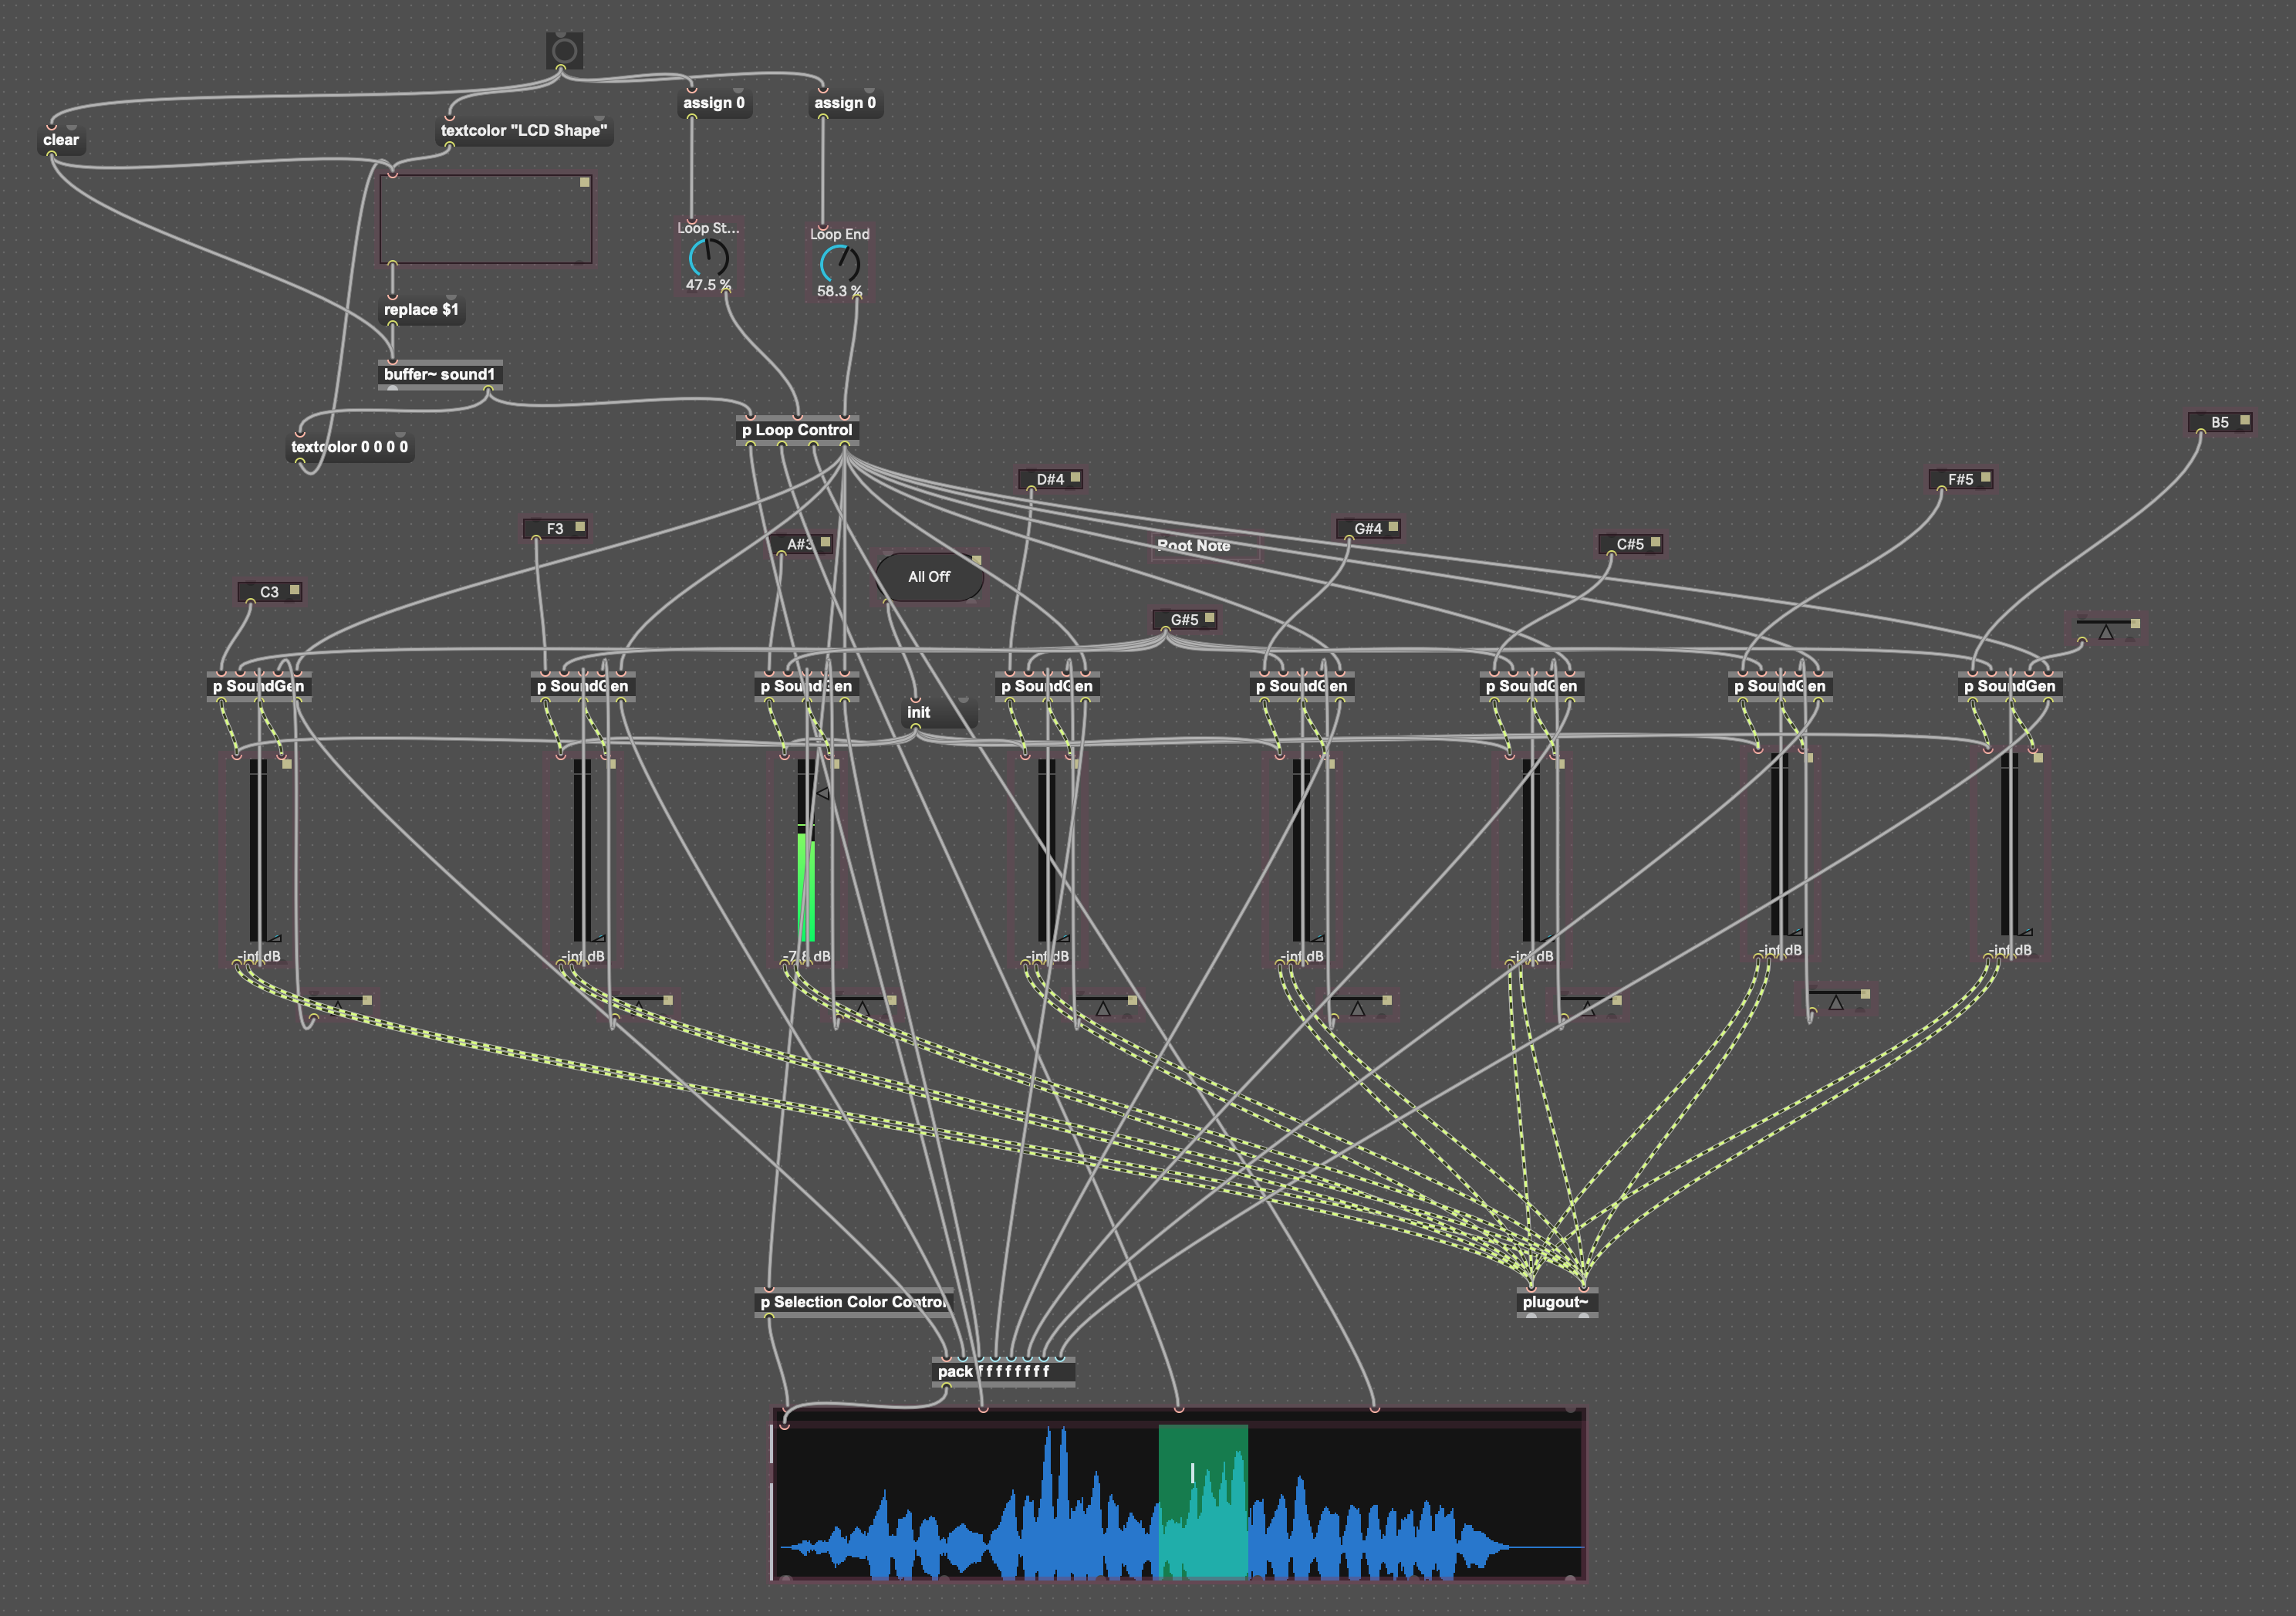
The dropped sample populates a buffer~ device. There are then 8 instances of a group of devices that will play back that buffer, starting with a groove~ device. Each of those instances can be configured with a pitch/note to play. The Gain slider is connected to some logic/math that will trigger the groove~ device to play once the gain is raised above -inf Db. Open it up and check it out!
And it is also a Blue Footed Boobie.

Contributing
If you would like to contribute, then please have a look at the code on GitHub. Fork the repo, make your changes, then open a pull request to propose a change. Thanks!
Feedback is Appreciated!
If you use it and it works or doesn't work, please let me know. [email protected]