Home Time Machine / NAS With a Raspberry Pi
The Problem
I've got a few computers at home and a few random external hard drives that sometimes back up those computers. Since some are laptops, I need to remember to connect the external drive to them, which of course doesn't always happen. Also, there's no slick way to share files between computers, aside from setting up specific shares on each computer.
What I need is a network storage system. Something that's always there, accessible via WiFi, can be used via Time Machine on my Macs, reliable, and most of all, CHEAP. Here's what I came up with...
The Solution
My first thought went to a Raspberry Pi. I have heard about them, but never used one. After a bit of research, I was blown away. It's a credit card sized, quad core computer running Linux with gigabytes of RAM, two HDMI ports, four USB ports, and gigabit ethernet, all for about $50. Add a case and other necessary accessories like a power supply and microSD card to hold the operating system, and we're still talking $90 for a computer that would have been top of the heap a few years ago.
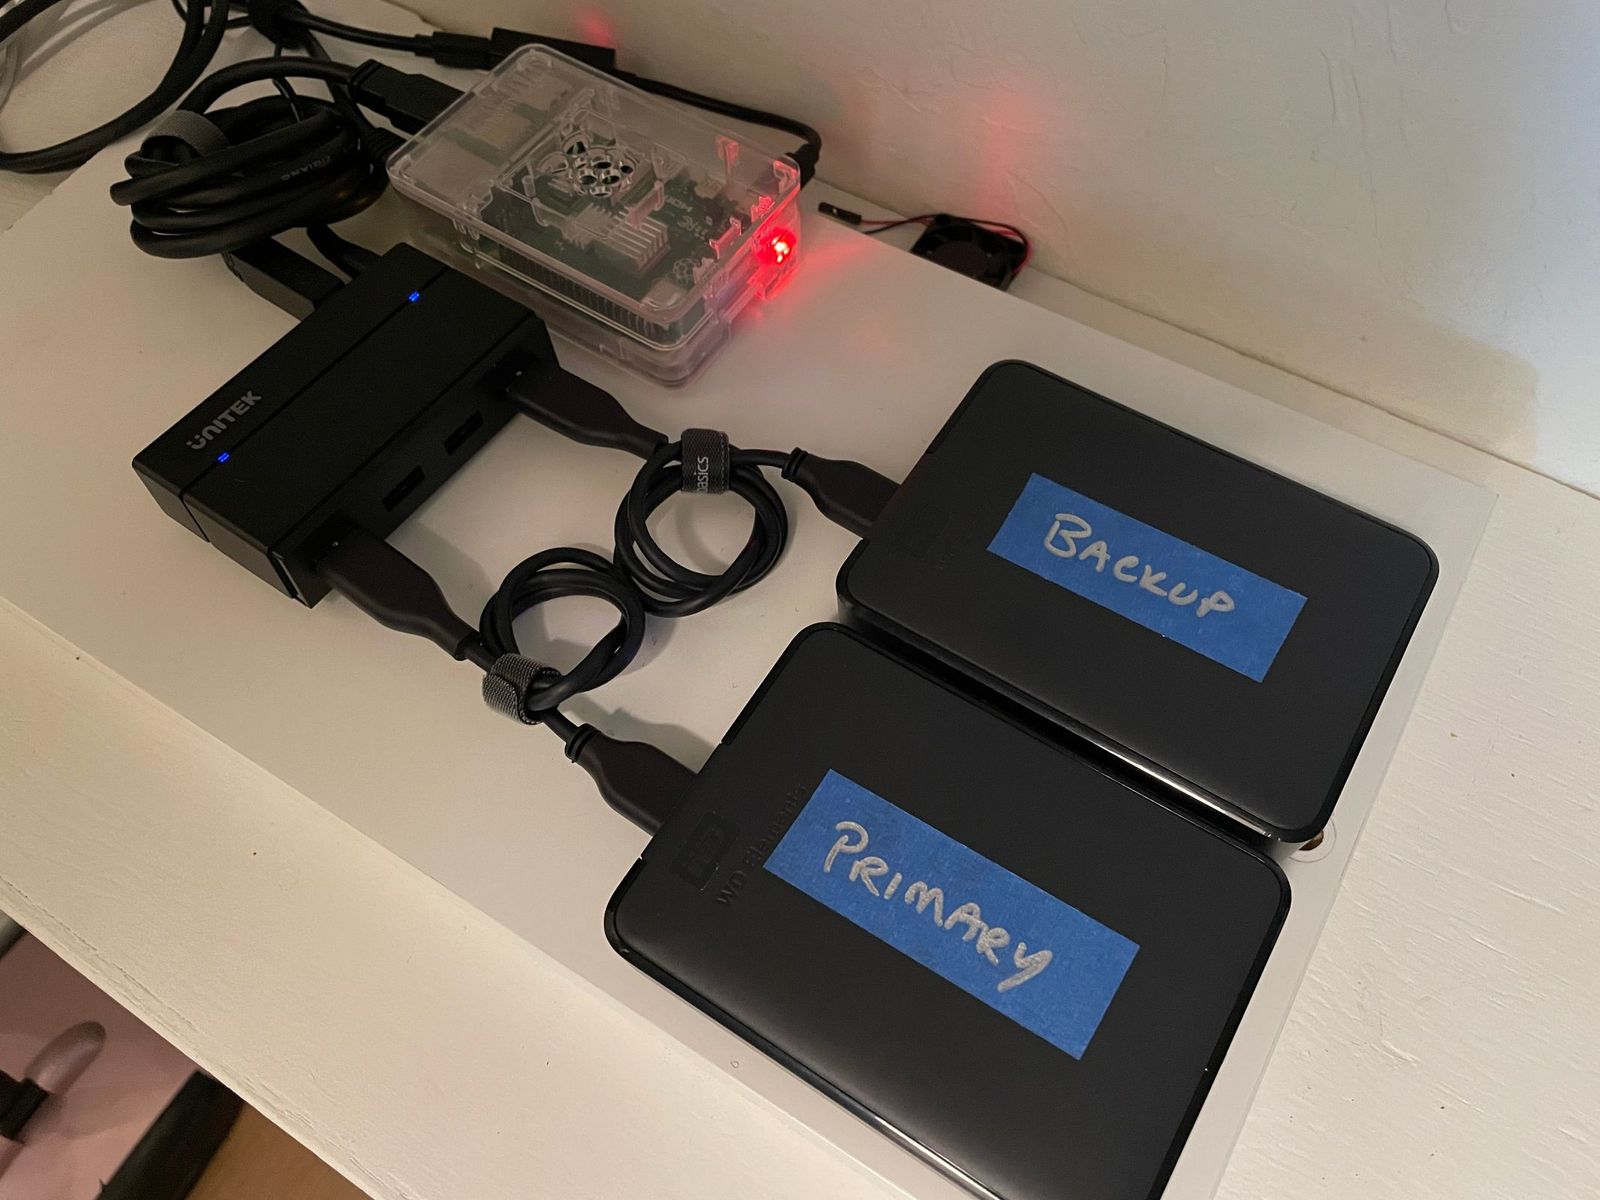
The other main part of the solution is a pair of external hard drives. I decided to go big with 4TB drives, since they were twice the size of my largest (mostly empty) external drive, and still pretty inexpensive at $90 each.
Even though the Raspberry Pi has four USB ports, the total power output to all ports combined is capped at 6W, which is not enough to power the hard drives. The solution to that is to use a powered USB hub, so the drives get their juice from the hub rather than the computer. If I had used SSDs (far more expensive at $400 each for 2TB), the USB hub would probably not be necessary (but it would be close).
Operating System Setup
Since I planned to keep this litte computer in the pantry next to my DSL modem and Eero Wifi, I didn't need a graphical operating system, so I chose the "OS Lite" option when imaging the MicroSD card.
USB Hub Gotcha
I tried two powered USB hubs, and both required that the computer be powered up, then attach the hub, then power on the hub, then attach the drives to the hub. I'm not sure why this is, but it was frustrating me until I figured that out.
To RAID or Not to RAID
Initially I set up the pair of hard drives in a RAID-1 set using mdadm, but then I remembered my experience from years ago with a similar home RAID setup and how much of a pain it was to be limited to the smallest drive in the set, and that recovery from failure was not a trivial matter.
So I settled on having a primary and backup disk, with a nightly cron job to rsync the primary to the backup drive. This gives me tons of flexibility in future drive size and a 1 day buffer against mistakes. I don't need the improved read performance that RAID can offer, so for me this was the best solution.
To set up the daily cron job, put a file in /etc/cron.daily/backup_external with the following content:
#!/usr/bin/sh

rsync -av --delete /mnt/primary/ /mnt/backup/
Then run sudo chmod 755 /etc/cron.daily/backup_external and you're set.
Disk Setup
Use the fdisk command to first delete the partition that may have come pre-configured on the disk, then create a single partition to use. You will need to do this for both disks. On my system, they were /dev/sda and /dev/sdb.
sudo fdisk /dev/sda
...
sudo fdisk /dev/sdb
First hit d for delete, then n to add a new partition. Accept all the defaults, and then w to write the new partition table. Don't forget to do this for both disks.
After partitioning, you will need to format the disks. Use the mkfs command for that, again on each drive.
mkfs /dev/sda1
...
mkfs /dev/sdb1
Mounting the Disks
In a Linux system, you have the choice to mount the disks by device node (e.g. /dev/sda) or by UUID. Because drives may come up at different times, or get plugged into different USB ports, the by-UUID scheme seemed like the best one for me.
You can get the disk UUIDs after partitioning and formatting them by running the blkid command, then you can use the partition UUID in /etc/fstab. Here's what mine looks like:
proc                                           /proc         proc  defaults          0  0
PARTUUID=3d58f093-01                           /boot         vfat  defaults          0  2
PARTUUID=3d58f093-02                           /             ext4  defaults,noatime  0  1
PARTUUID=06bfa78d-63ee-6643-bbc7-cc89b1e97cf8  /mnt/primary  ext4  defaults          0  0
PARTUUID=d48b679a-3cd1-c142-a84d-8961aba30987  /mnt/backup   ext4  defaults          0  0
Substitute your PARTUUIDs above, then run the following to mount the disks.
sudo mkdir /mnt/primary
sudo mkdir /mnt/backup
sudo mount -a
If all is well, both /mnt/primary and /mnt/backup will have a Lost+Found directory in them.
Setting Up Folders
I wanted one share/folder for Time Machine backups and another for general shared storage. Because I don't want to require a user login for either, do the following to set up two folders:
sudo mkdir /mnt/primary/backups
sudo mkdir /mnt/primary/shared
sudo chown nobody: /mnt/primary/backups
sudo chown nobody: /mnt/primary/shared
Setting up Samba to Look Like a Time Capsule
After installing Samba with sudo apt install samba samba-common-bin, you can configure it so that Macs on your network see it as an Apple Time Capsule. I wanted to have one share that was for shared storage, and another dedicated to backups.
Since this is inside my home network and I don't have a guest network, I decided not to require authentication to connect to the shares.
This is what I added to the end of /etc/samba/smb.conf to do all that. Note the use of the "nobody" account here, as well as in creating the folders above.
usershare allow guests = yes

min protocol = SMB2
vfs objects = fruit streams_xattr
fruit:metadata = stream
fruit:model = MacSamba
fruit:posix_rename = yes
fruit:veto_appledouble = no
fruit:wipe_intentionally_left_blank_rfork = yes
fruit:delete_empty_adfiles = yes

[shared]
    comment = Shared
    path = /mnt/primary/shared
    public = yes
    guest ok = yes
    guest only = yes
    guest account = nobody
    browseable = yes
    read only = no

[backups]
    comment = Backups
    path = /mnt/primary/backups
    public = yes
    guest ok = yes
    guest only = yes
    guest account = nobody
    browseable = yes
    read only = no
    fruit:time machine = yes
Restart Samba (sudo service smbd restart), and you're set.
Mac Discovery
To allow the Macs and iOS devices on the network to discover the Raspberry Pi for backups and file sharing, you can use the avahi-daemon. This was already installed and running on my Pi. This is the content of my /etc/avahi/services/samba.service file:
<?xml version="1.0" standalone='no'?><!--*-nxml-*-->
<!DOCTYPE service-group SYSTEM "avahi-service.dtd">
<service-group>
  <name replace-wildcards="yes">%h</name>
  <service>
    <type>_smb._tcp</type>
    <port>445</port>
  </service>
  <service>
    <type>_device-info._tcp</type>
    <port>9</port>
    <txt-record>model=TimeCapsule8,119</txt-record>
  </service>
  <service>
    <type>_adisk._tcp</type>
    <port>9</port>
    <txt-record>dk0=adVN=backups,adVF=0x82</txt-record>
    <txt-record>sys=adVF=0x100</txt-record>
  </service>
</service-group>
After editing the file, you will need to restart the avahi service with:
sudo service avahi-daemon restart
At this point, you should be able to see the Raspberry Pi from the Finder on Macs under Network, and in the Files app on iOS devices under Shared.
Wrap Up
After getting everything working, I buttoned up the hardware by attaching it to a piece of wood using velcro, mostly to avoid having the hard drives getting bumped or knocked off their shelf. I attached it to the Eero with an ethernet cable, which easily doubled the speed at which files could be transferred to/from it vs. over WiFi. Connecting the Macs in the house to it was a piece of cake, and it's fun to have an always-on Linux server in the house.